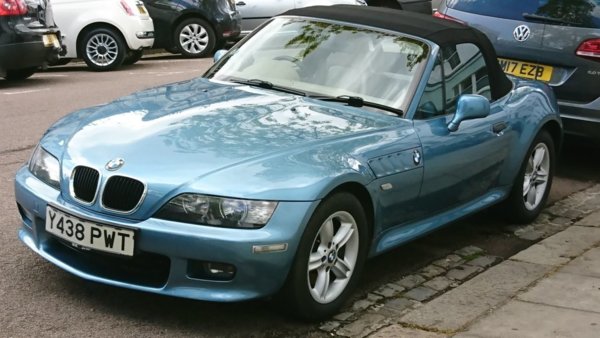
Atlanta Blue 2.2 project

James S

Regular Member
British Zeds
Joined
Apr 26, 2018
Points
20
Location
North West London
Model of Z
Z3 2.2i
This is my first restoration project so it's going to be a bit of a slow one. I'm hoping you'll spot my blunders and point them out to me.

So far, I've had the car MOT'd, checked fluids, replaced the 11 year old rear tyres with Pirellis to match the fronts and had the tracking done (it was a degree out at the front).

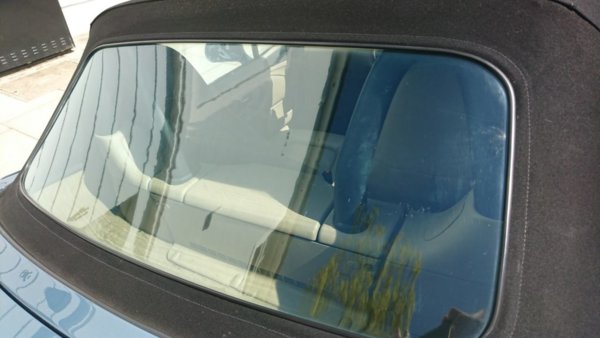
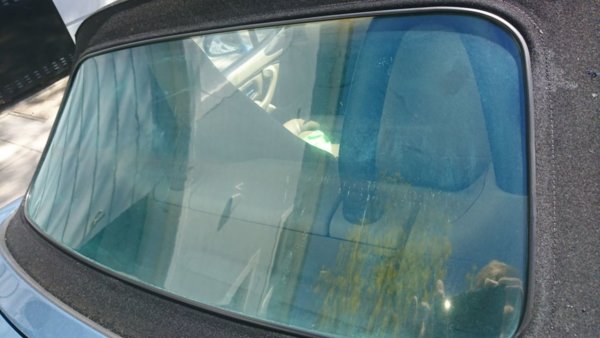
Today, I tackled the cloudy, scratched rear windscreen with some polish. I thought I'd probably need to replace it, but thought why not have a go. The improvement is considerable, even though this was just a hand polish. Before and after shots below. The before is after washing inside and out with soapy water. The polish I used was just some G3 colour restorer I already had. I'll hang onto the original rear windscreen for now.

Rear windscreen before.jpeg Rear windscreen after polish.jpeg
 

Ianmc

Zorg Guru (IV)
British Zeds
The M44 Massive
Joined
Oct 12, 2014
Points
165
Location
New Forest
Model of Z
Z3 (M44)
Rear screen looks great, better than many (including mine!).:thumbsup:
 

Sean d

Zorg Expert (I)
Supporter
British Zeds
Joined
Sep 29, 2015
Points
201
Location
Lincolnshire
Model of Z
Z3 2.8
This is my first restoration project so it's going to be a bit of a slow one. I'm hoping you'll spot my blunders and point them out to me.

So far, I've had the car MOT'd, checked fluids, replaced the 11 year old rear tyres with Pirellis to match the fronts and had the tracking done (it was a degree out at the front).

Today, I tackled the cloudy, scratched rear windscreen with some polish. I thought I'd probably need to replace it, but thought why not have a go. The improvement is considerable, even though this was just a hand polish. Before and after shots below. The before is after washing inside and out with soapy water. The polish I used was just some G3 colour restorer I already had. I'll hang onto the original rear windscreen for now.

View attachment 79094 View attachment 79095
Looks almost new, I also used G3 on my last Z but I used a pneumatic polisher
 

ZTec

Zorg Guru (IV)
Supporter
British Zeds
The M44 Massive
Joined
Oct 18, 2014
Points
171
Location
Llantwit Major
Model of Z
Z3
This is my first restoration project so it's going to be a bit of a slow one. I'm hoping you'll spot my blunders and point them out to me.

So far, I've had the car MOT'd, checked fluids, replaced the 11 year old rear tyres with Pirellis to match the fronts and had the tracking done (it was a degree out at the front).

Today, I tackled the cloudy, scratched rear windscreen with some polish. I thought I'd probably need to replace it, but thought why not have a go. The improvement is considerable, even though this was just a hand polish. Before and after shots below. The before is after washing inside and out with soapy water. The polish I used was just some G3 colour restorer I already had. I'll hang onto the original rear windscreen for now.

View attachment 79094 View attachment 79095
Wow what a good job, mines too far gone, new roof on Thursday.
 

Slam

Zorg Guru (IV)
Supporter
British Zeds
Joined
May 24, 2017
Points
168
Location
North Yorkshire
Model of Z
Zedless. Mini GP 1379
Blimey the screen looks like new, think I need to look at mine now
 

James S

Regular Member
British Zeds
Joined
Apr 26, 2018
Points
20
Location
North West London
Model of Z
Z3 2.2i
Last weekend I got around to washing/treating the zed's roof (Autoglym) and then today gave the whole car a good wash and wax. I'm now a bit more familiar with her cosmetic imperfections.

Z3 wash wax.jpeg

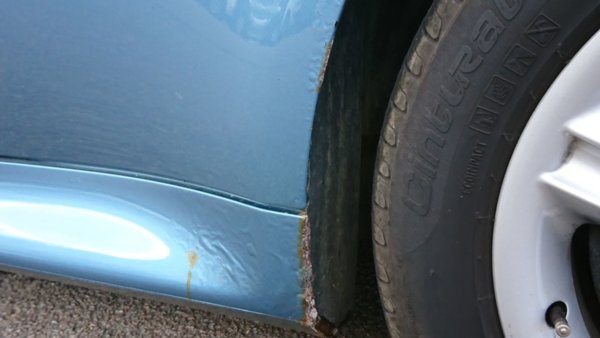
It seems like a full respray might eventually be the way to go, but there are significant rust issues to sort out first. I'd like to fix this myself to the extent a tidy result is achievable. If anyone's (everyone's???) done similar work, it'd be useful to hear which panels you think may be salvageable or should just be replaced.

I'm pretty sure the offside sill cover is ready to be retired. Perhaps the front quarter wing too?

Z3 offside sill wing.jpeg

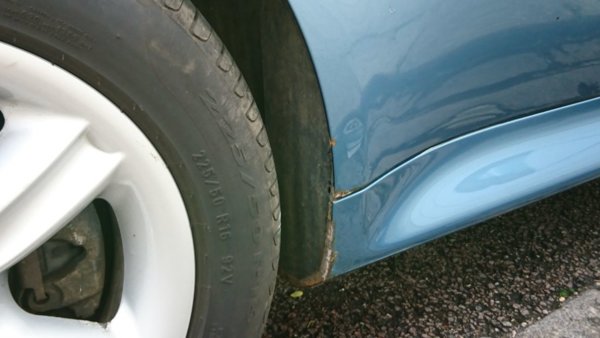
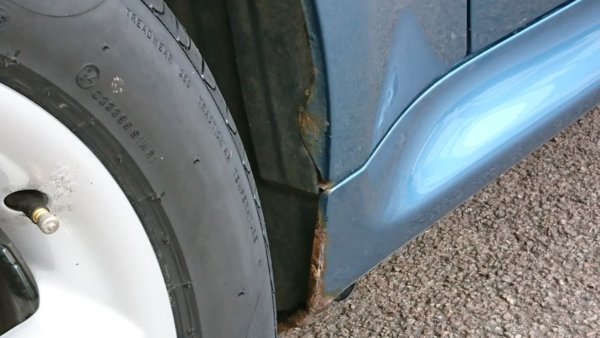
The offside rear looks a little better but there is some rust on the rear wing and this end of the sill cover looks pretty bad too.
z3 offside rear wing and sill.jpeg

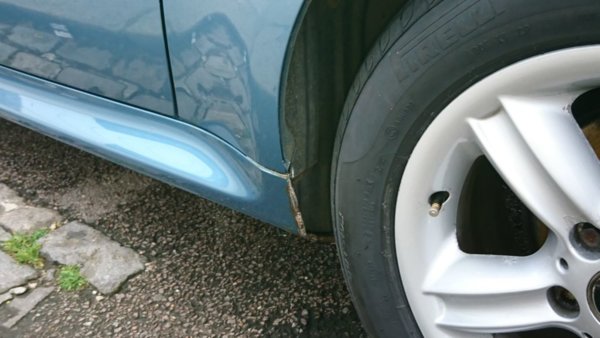
Slightly better story on the nearside but that sill still looks fairly rusted through at the front end.
z3 nearside front wing and sill.jpeg

Nearside rear:
z3 nearside rear sill.jpeg

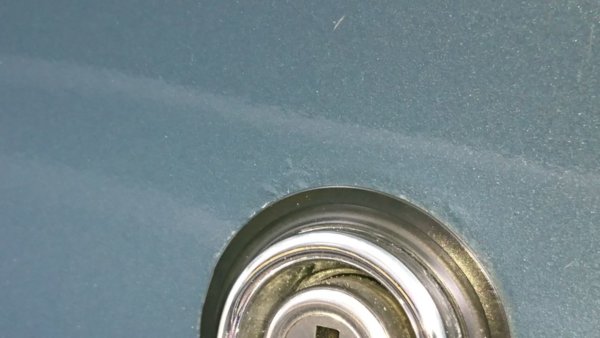
Some other little rust spots. The usual boot latch issue.
z3 boot latch.jpeg

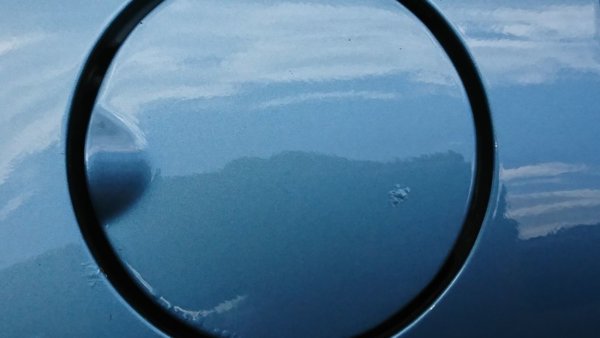
Bubbling on / near filler door.
z3 Filler door.jpeg

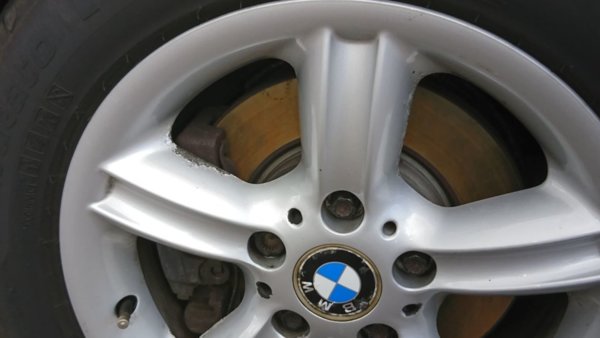
And of course the 17 year old alloys have seen better days. Refurb and new centres needed for these.
z3 wheel.jpeg

That's it for now.

James
 

Grumps

Always happy, apart from when I'm not 🤬
Supporter
British Zeds
Joined
Apr 27, 2014
Points
226
Location
Forest Town, Mansfield
Model of Z
Z4 e85 2.5i
Nice thread mate. Will watch with interest. There are some better stock options off a 2.2 you could maybe get hold of rather than refurbing the ones you have?
 

James S

Regular Member
British Zeds
Joined
Apr 26, 2018
Points
20
Location
North West London
Model of Z
Z3 2.2i
Thanks @Grumps. I can't promise quick progress but I'll keep you all updated.

I'll have a look at the stock wheel options. I do quite like how these original ones age the car, just not the way the paint's peeling off them.

Talking of upgrades, after two weeks of ownership I already feel like heated sports seats would make a big difference to the driving experience. I have the standard seats and they're not the most supportive or comfortable. Anyway the driver's side bushes and passenger side electric adjustment needs sorting out in due course.

James
 

James S

Regular Member
British Zeds
Joined
Apr 26, 2018
Points
20
Location
North West London
Model of Z
Z3 2.2i
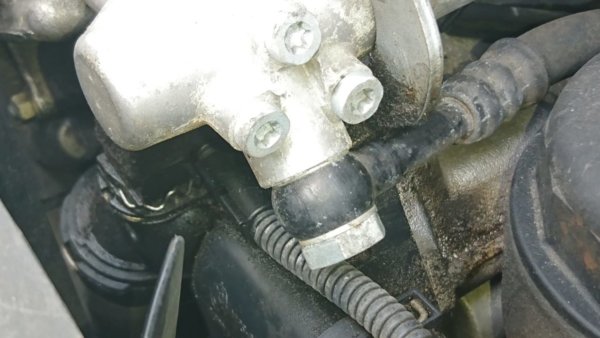
Getting onto the mechanical stuff, I took this pic of the minor oil leak near the front of the engine (we noticed this before buying the car).
z3 oil leak.jpeg

Vanos seal maybe? I read somewhere these are generally going to need changing on a 60k plus engine. The leak's not bad - no oil pooling under the car, but something clearly needs sorting. It's the only leak I've picked up so far on the car.

In terms of forum etiquette, is this the right place to ask these questions or would I be better off starting another thread?
 

Jack Ratt

Zorg Expert (I)
Supporter
British Zeds
The West Country
Joined
Dec 3, 2013
Points
200
Location
TRURO, CORNWALL
Model of Z
2.8i AUTO and 2.8i MANUAL
Getting onto the mechanical stuff, I took this pic of the minor oil leak near the front of the engine (we noticed this before buying the car).
View attachment 79594

Vanos seal maybe? I read somewhere these are generally going to need changing on a 60k plus engine. The leak's not bad - no oil pooling under the car, but something clearly needs sorting. It's the only leak I've picked up so far on the car.

In terms of forum etiquette, is this the right place to ask these questions or would I be better off starting another thread?
Hi James
That looks like the vanos case seal. You can't see a "leaky" vanos seal as the leaked oil would stay inside the vanos casing. The vanos case seal is a thin metal seal and if you are removing the vanos to replace this, then you may as well go the whole hog and change the actual vanos seals too. It's not a difficult job though. Remove the radiator though to give yourself as much room to work as possible. Good luck
 

James S

Regular Member
British Zeds
Joined
Apr 26, 2018
Points
20
Location
North West London
Model of Z
Z3 2.2i
Thanks @Jack Ratt. That's really helpful. I will do the vanos seals at the same time.

I've just watched this video on M54 double vanos seal replacement (https://www.youtube.com/embed/zojrkAFTscA?rel=0) posted by @Sean d previously (thank you). I think you're talking about the vanos case gasket that comes off at 6.44 in the video?

So, I need to get a vanos seal kit (not OEM buna rubber) and a vanos case gasket. I think it'd make sense to replace the valve cover gasket whilst it's off, even though it's not leaking at the moment. Maybe taking it off would cause it to leak anyway after 17 years / 62k miles.

James
 

James S

Regular Member
British Zeds
Joined
Apr 26, 2018
Points
20
Location
North West London
Model of Z
Z3 2.2i
Some steps forward over the past couple of days and a few new jobs for the list: We (I'm doing some of this project with my brother) replaced the leaking vanos casing gasket and whilst in there replaced the vanos piston o-rings and seals (including a major brown trousers moment) and the valve cover gaskets. First though we tackled the apparently dead passenger seat electric adjustment.

The seat was stuck in the fully up and nearly fully back position. The switch did absolutely nothing - totally dead - so we suspected a simple blown fuse when purchasing the car. No such luck. Getting the seat out was the first challenge as the rear rail bolts were obscured by the seat. We disconnected the spindles from the forward/backward motor and inched them forward by using the chucks of two electric screwdrivers. You have to apply quite a lot of force to the spindles to separate them from the motor.
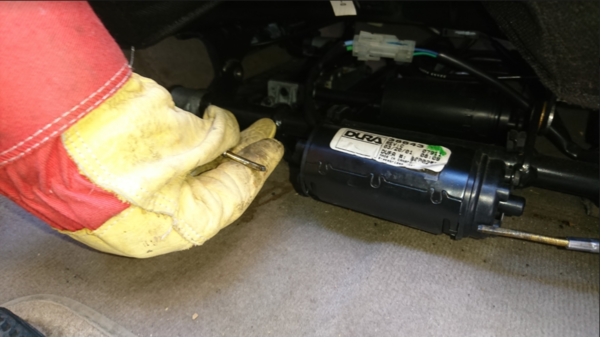
Screen Shot 2018-06-19 at 23.24.31.png

Using two screwdrivers sped things up a bit rather than using the "alternate sides an inch at a time" method. With the seat eventually unbolted from the floor and out we checked the resistance across both motors. Both looked fine at about 4 ohms, so we tried applying a voltage using a starter battery. The forward/back motor worked fine. The up/down motor jolted the mechanism and shorted. The motor was trying to work but the mechanism was jammed.

The height adjustment relies on a rotating bolt/shaft which pushes (height up) and pulls (height down) on a metal housing. Anyone know what this kind of mechanism is called? The end of the shaft is seen on the left in this picture, terminated with a retaining washer. It got jammed in this fully extended position (seat at highest). Anyway, we managed to disconnect the other end (off this picture to the right) and force the housing back onto the bolt/shaft using an appropriately sized spanner to turn it back onto the thread.
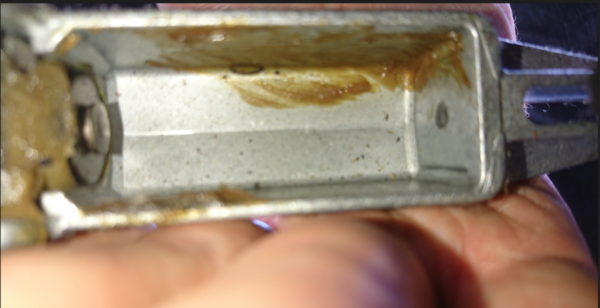
Screen Shot 2018-06-19 at 22.50.19.png

We also had to replace the passenger seat adjuster fuse (which was missing from the fuse box - position 5). I guess the original blew, was replaced and blew again so was removed by the garage. Incidentally, the car's BMW centre history says the adjuster switch was broken, requiring a whole new seat at £700, so this felt like a nice DIY victory.

The seat now works perfectly although I'll have to ask passengers, particularly small ones, not to adjust the seat too high for fear of the same happening again. Has anyone had the same issue and found a solution that stops this bolt coming out too far and getting jammed again?

The vanos seal / gasket replacement procedure is well documented elsewhere so I'll just say what went wrong in our case:

I thought I'd read the M54 engine didn't require the viscous coupling fan removal tool. Wrong! Very fortunately we managed to disconnect it using the intertia of the system, a 32mm spanner and a big hammer. The job couldn't have been completed with the fan on as there's not enough space to pull the vanos out from the head bolts.

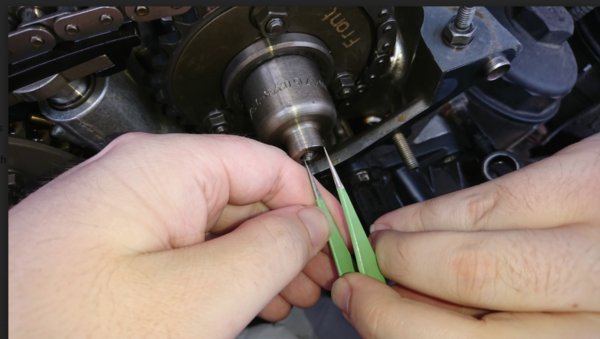
Brown trousers moment: Despite knowing better, I used a torque wrench near the bottom of its range to tighten the very delicate vanos piston bolts. The inlet piston bolt sheared. As I felt it go I desperately hoped the torx bit had fallen out, but sadly not. Some words were exchanged and I had visions of flat-bedding the zed to a BMW specialist. It was a sorry sight:
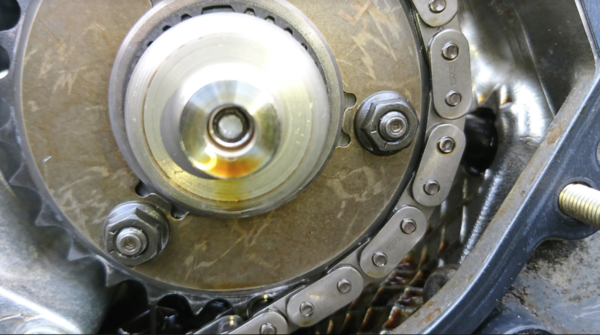
Screen Shot 2018-06-19 at 23.52.45.png

That's having taken the vanos unit back off. The white thing in the middle of the timing cog is the sheared end.

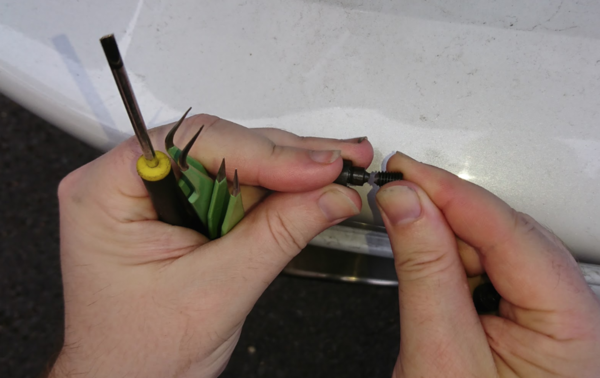
Much to our relief, the end of the bolt wasn't actually that tight in the thread. It took my bro about half an hour using a pair of very pointy electronics tweezers to slowly wind the end out. High fives ensued.Screen Shot 2018-06-20 at 00.03.43.png

Screen Shot 2018-06-20 at 00.05.07.png

We had spare bolts, so thankfully we could carry on. We thought it was going to be so much worse.

Nothing else particularly remarkable happened and I've driven the car 70 miles since with no further visible oil leaks. I can feel no improvement in performance but I guess that's to be expected due to the faulty cam position sensors (see below).

The vanos seal procedure is largely straightforward except the removal of the old seals and o-rings from the vanos pistons. To do this without damaging the pistons took me about an hour and a lot of patience with a very sharp pointed craft knife. The seals were hard and the o-rings were a bit flattened so I think it needed doing. Certainly, before replacement the pistons were looser in their chambers.

New jobs:

The car's throwing up three fault codes which I assume have been there since I bought it.

- P0344: Camshaft position sensor A circuit intermittent (this is the inlet cam sensor)
- P0365: Camshaft position sensor B circuit (this is the exhaust cam sensor)
- P1620: MAP cooling thermostat control circuit signal high

It looks like I need to replace both camshaft position sensors and the thermostat. I don't like the idea of the thermostat being faulty, but the car hasn't overheated at all yet.

Bonnet release: During the vanos/gasket work I closed the bonnet with something resting in the left hand side of the engine bay. I had to pretty much force the bonnet back open and now it's coming unlatched whilst driving along (not completely - it's being caught by the manual safety latch thankfully). It's bloody dangerous anyway. I don't know where to start with this. The bonnet release still works normally when it is closed, but I guess the latches are now loose or broken somehow. Kicking myself about this one - such a dumb mistake.

Anyway, it was good to start making some headway on the car. Still a long way to go.

James
 

Roads_Scholar

Regular Member
Joined
Jun 18, 2018
Points
16
This is my first restoration project so it's going to be a bit of a slow one. I'm hoping you'll spot my blunders and point them out to me.

So far, I've had the car MOT'd, checked fluids, replaced the 11 year old rear tyres with Pirellis to match the fronts and had the tracking done (it was a degree out at the front).

Today, I tackled the cloudy, scratched rear windscreen with some polish. I thought I'd probably need to replace it, but thought why not have a go. The improvement is considerable, even though this was just a hand polish. Before and after shots below. The before is after washing inside and out with soapy water. The polish I used was just some G3 colour restorer I already had. I'll hang onto the original rear windscreen for now.

View attachment 79094 View attachment 79095
What did you use for the rear wind screen?
 

James S

Regular Member
British Zeds
Joined
Apr 26, 2018
Points
20
Location
North West London
Model of Z
Z3 2.2i
@Roads_Scholar: Originally I used G3 Colour Restorer but that's designed for use on paint. Since then I've had another go with Meguiar's Plast-RX, which I'd recommend.
 

Lazzzydog

Zorg Guru (III)
Supporter
British Zeds
Joined
Oct 9, 2015
Points
148
Model of Z
3.2
I would not be too concerned about the P1620 code if the car is showing no signs of over heating it may just have been a gremlin in the electrickery. Delete all the codes and if this one does not re-appear all should be well. The thermostat on these cars tends to fail when a little plastic retainer breaks on one side and the stat sticks open causing cool running not over heating.
Great work so far, except bending the bonnet catches! :thumbsup:
 

James S

Regular Member
British Zeds
Joined
Apr 26, 2018
Points
20
Location
North West London
Model of Z
Z3 2.2i
I would not be too concerned about the P1620 code if the car is showing no signs of over heating it may just have been a gremlin in the electrickery. Delete all the codes and if this one does not re-appear all should be well. The thermostat on these cars tends to fail when a little plastic retainer breaks on one side and the stat sticks open causing cool running not over heating.
Great work so far, except bending the bonnet catches! :thumbsup:
Thanks @Lazzzydog. I'm on a steep learning curve but loving the project and the car. That's reassuring, but the code is recurring after clearing it. Replacing ageing cooling system parts is next but one on my list anyway but I won't worry too much in the meantime (particularly as it's the Summer). Next, both camshaft position sensors.

And bonnet catches now bent back into place.

James
 

James S

Regular Member
British Zeds
Joined
Apr 26, 2018
Points
20
Location
North West London
Model of Z
Z3 2.2i
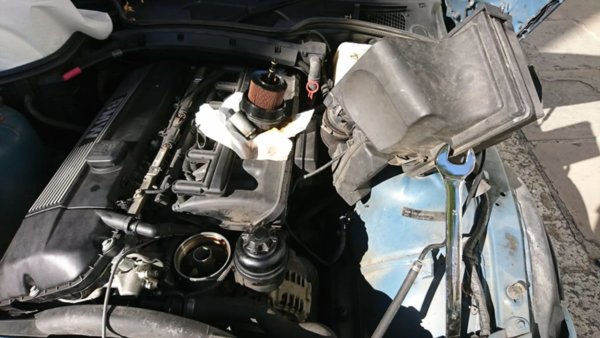
Spent a few hours on the zed yesterday changing the inlet and exhaust camshaft position sensors with new OEM replacements from Soper (excellent service and price again from those lads). The job took longer than necessary as I spilled oil from the oil filter housing down onto the fan belt and had to get the fan off for a good clean up. The inlet side took about 10 times as long as the exhaust side because so many parts needed to come off to get to the sensor (behind the vanos solenoid) and its connector (back behind the alternator). BMW apparently suggest replacing the holding bolts on these sensors as they're held in with blue threadlocker. I just cleaned them and used a bit more threadlocker, tightening to 9 Nm which seems to have worked fine.

I only took one picture half way through the inlet side. I'm getting plenty of value out of my 32mm spanner!
WhatsApp Image 2018-07-02 at 19.31.09.jpeg

I cleared the two position sensor fault codes and they've not returned so that's another satisfying job done. Low down torque is definitely up. I'd say it pulls more like a 168 bhp car should now.

The job was made more entertaining by a random Chinese man watching me work for a couple of hours with occasional pointing and nods of approval. The joys of working by the side of the road...
 
Top