Susan
Dedicated Member
Sub box
What you will need
Cut all pieces and pre drill all holes.
Cut out the shape of the Speaker terminal cup in the back of “A”.

Screw 2 “H” support blocks to “B” (Fig 1)

Screw “A” “C” and “D” to the “H” support blocks (Fig2)

Screw “D” “E” & “F” to support blocks “I” to top and bottom (Fig 3)

Screw in support blocks “J” (Fig4)

Screw Support block “K” into top leaving a 5mm gap at the back and side.

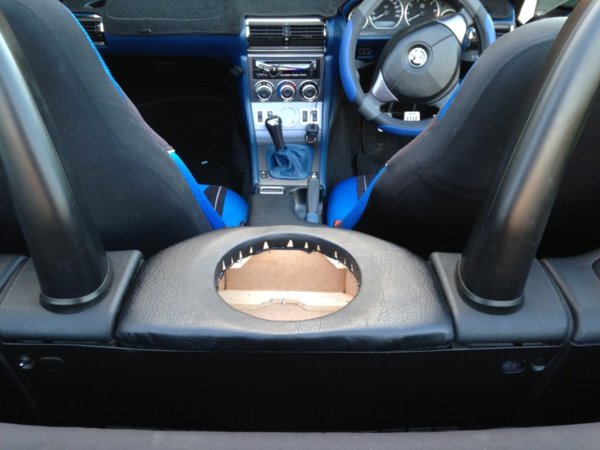
Turn top over and screw Sub ring to top of Sub top.

With a hacksaw cut the foam to cover around the sub ring.

Then cover it in leather or Vinyl and staple down the edges.


Fit the top on and screw into “K” on both sides.

Now turn it upside down and where “G” goes screw the support blocks “I” to the top. The silicon all the edges inside the box.

Screw “G” into place, screwing into support blocks.

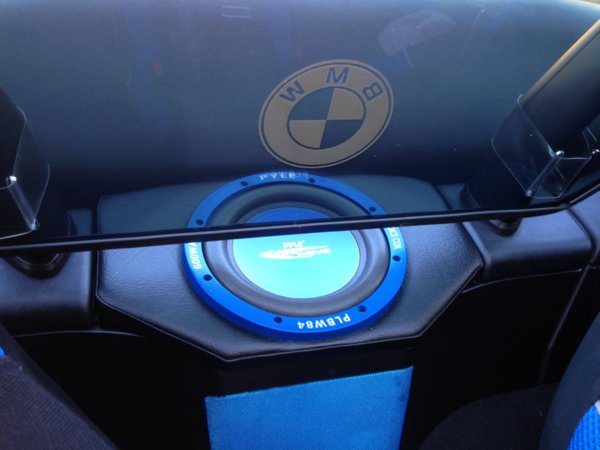
Spray box with glue and cover in sub carpet. then cut hole in the carpet for the Speaker terminal cup and screw it into place.

What you will need
- 5mm MDF board
- 15mm MDF board (for Sub ring)
- 20mm think EVA Foam
- Small screws
- Wood glue
- Silicone sealant
- 10mm thick Wood (for support blocks)
- Sub carpet
- Speaker terminal cup
- Spray glue
- Leather or weather proof Vinyl
- Jigsaw
- Screwdriver
- Drill and drill bits to pre drill holes
- Pen or pencil
- Sandpaper
- Staple gun and staples
- Hacksaw blade (for cutting foam)
Cut all pieces and pre drill all holes.
Cut out the shape of the Speaker terminal cup in the back of “A”.
Screw 2 “H” support blocks to “B” (Fig 1)
Screw “A” “C” and “D” to the “H” support blocks (Fig2)
Screw “D” “E” & “F” to support blocks “I” to top and bottom (Fig 3)
Screw in support blocks “J” (Fig4)
Screw Support block “K” into top leaving a 5mm gap at the back and side.
Turn top over and screw Sub ring to top of Sub top.
With a hacksaw cut the foam to cover around the sub ring.
Then cover it in leather or Vinyl and staple down the edges.
Fit the top on and screw into “K” on both sides.
Now turn it upside down and where “G” goes screw the support blocks “I” to the top. The silicon all the edges inside the box.
Screw “G” into place, screwing into support blocks.
Spray box with glue and cover in sub carpet. then cut hole in the carpet for the Speaker terminal cup and screw it into place.
Last edited by a moderator:


