Time for an overhaul of my 1.9 '98 BMW Z3 Individual

Matt Barnes

Zorg Guru (II)
Supporter
British Zeds
Joined
Jul 18, 2020
Points
123
Location
Portchester, Fareham
Model of Z
1998 BMW Z3 Individual 1.9 M44 B19
Not doing any bodywork today but....the morning after the day before. Although most of that has to come off for when I do the welding, must say I'm impressed with the POR15 finish... rock hard and shiny.. the light bits are reflections of the driveway....

1707652153825.png

1707652174639.png

1707652198383.png


this'll keep the wolf from the door until I get the welder out
 

Matt Barnes

Zorg Guru (II)
Supporter
British Zeds
Joined
Jul 18, 2020
Points
123
Location
Portchester, Fareham
Model of Z
1998 BMW Z3 Individual 1.9 M44 B19
Keep up the good fight mate, at least you’ve got an excuse to learn to weld now.!
Thanks mate... yeah I genuinely thought I had gotten away with it, with just the holes around the jacking pads.... took the front wheels off... had a poke.. .and the rest is history...... oh... and given the slope, I make sure I put the front wheels back on when I finish :whistle: :whistle:

upside is... no holes at all on the passenger side... so at least it's only the driver's side I need to deal with..I've just ordered a couple of sheets of 2mm sheet steel, as I know I'm going to balls it up so want plenty of spare ! =)) =))
 

DrWong

Zorg Guru (III)
Joined
May 8, 2017
Points
125
Model of Z
3.0i
Keep us updated on the welding missions - I’ve always wanted to learn (but quite glad I don’t have a reason to yet!)
 

Matt Barnes

Zorg Guru (II)
Supporter
British Zeds
Joined
Jul 18, 2020
Points
123
Location
Portchester, Fareham
Model of Z
1998 BMW Z3 Individual 1.9 M44 B19
Keep us updated on the welding missions - I’ve always wanted to learn (but quite glad I don’t have a reason to yet!)
will do mate...… Given my limited experience plus the help from @IainP ..I've had a fair few cracks at it in the garage with spare bits.... I've also learnt that doing it with a flux core welder is apparently harder that a MIG welder (more spatter, extra heat etc)... luckily, I don't know any different =))
 

IainP

Zorg Guru (II)
British Zeds
Joined
Feb 20, 2019
Points
119
Location
Out of my Tree, North of Perth, Scotland
Model of Z
1.9
At least you haven’t ended up like my son, he’d never welded before either.
IMG_5294.jpeg
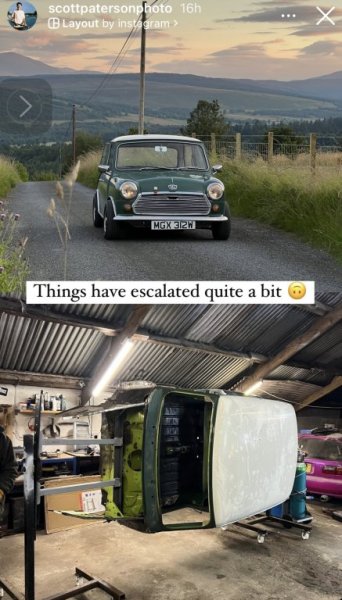
Though panels are easily available for Mini’s. Just as well that’s a really big bottle of gas!
im off on Wednesday, will try and find the piece I made to form the repair section for my rear sill, can’t be that far away from the shape of the front.
 

Matt Barnes

Zorg Guru (II)
Supporter
British Zeds
Joined
Jul 18, 2020
Points
123
Location
Portchester, Fareham
Model of Z
1998 BMW Z3 Individual 1.9 M44 B19
At least you haven’t ended up like my son, he’d never welded before either.
View attachment 290779
Though panels are easily available for Mini’s. Just as well that’s a really big bottle of gas!
im off on Wednesday, will try and find the piece I made to form the repair section for my rear sill, can’t be that far away from the shape of the front.
wow!... that's a hell of a lot for a newbie welder!... bet he's great at it now though ! 👏👏
 

Matt Barnes

Zorg Guru (II)
Supporter
British Zeds
Joined
Jul 18, 2020
Points
123
Location
Portchester, Fareham
Model of Z
1998 BMW Z3 Individual 1.9 M44 B19
well rain stopped play today, especially for anything bodywork related..... so.... I thought I'd give the calipers are layer of clear coat to see how they look....not too shabby I suppose....

1708175795707.png


then I thought I'd better practice some more welding before my "big event" of tackling the sills... =))

Got some 2mm sheet, and ordered some more in case I need it !... marked up a "similar profile" but with no folds....

1708175944379.png


my angle grinder cutting technique was shocking ! =))

1708175990269.png


got these little magnets off Amazon and mightily impressed, holds the metal rock solid... here's the link in case you fancy some


1708176116393.png


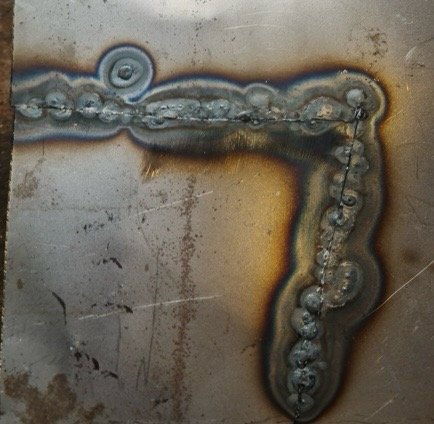
practiced a bit, got a couple of blow throughs until I found my goldilocks setting of Voltage and Wire Speed... this is for 0.9 wire on a Flux core welder.. MIGs will be different.....so about 17v and wire speed at a minimum... though I've just noticed that I left my welder on 0.8 and didn't change the setting to 0.9...so that may alter things...

1708176217836.png


Looks a mess but after I put a light behind it there was only one pinhole which I was chuffed about.....see what I mean about spatter and Flux Core dumping the flux?

1708176365305.png


After grinding back with the angle grinder
1708176413222.png


could do with a bit more penetration on the reverse but it's not three bad....

1708176492993.png


so I'll do a little more practice... on 0.9 setting this time!...... until it's Gin o'clock ! =))=)) 🍸🍸
 

Matt Barnes

Zorg Guru (II)
Supporter
British Zeds
Joined
Jul 18, 2020
Points
123
Location
Portchester, Fareham
Model of Z
1998 BMW Z3 Individual 1.9 M44 B19
I'm always willing to show the failures as well as successes..... so here goes !...... feeling confident that I could weld in a decent patch... I tried something smaller as practice .... about 2 inches square.....used a big blow through that looked very similar to a hole near the jack pad...

1708187524620.png


tried cutting it out with a Dremel but every cutting wheel I used either shattered, or disappeared in about a minute.... but... this is where I learned how precise you need to be to successfully weld a small patch....

1708187631465.png


notice how "not precise" it is....

masked over for a template..

1708187683408.png


pressed into shape and marked up

1708187718827.png


cut a corner out and put it in place with my new magnets... here's the point of failure..... look at the MASSIVE gaps

1708187779889.png


in the end it blew through so badly, the end hole was as big as the one it was supposed to be replacing !

1708187847413.png


so my lesson learned is.. the edges have to be as snug as possible for a good weld. I will of course chop this out and try properly next time !!
 

Duncodin

Zorg Guru (III)
Supporter
Joined
Sep 8, 2021
Points
139
Location
Pontrhydyrun
Model of Z
Z3 M44
Trying to butt two panels up against each other and welding between them is quite difficult. Usually better to overlap eapecially on bits nobody sees anyway.

But on panels people will see and to reduce the amount of body filler it's best to cut the new sheet a bit bigger so it over laps but bend a flange/step in the sheet and pop it in from behind.

See this
 

Matt Barnes

Zorg Guru (II)
Supporter
British Zeds
Joined
Jul 18, 2020
Points
123
Location
Portchester, Fareham
Model of Z
1998 BMW Z3 Individual 1.9 M44 B19
Trying to butt two panels up against each other and welding between them is quite difficult. Usually better to overlap eapecially on bits nobody sees anyway.

But on panels people will see and to reduce the amount of body filler it's best to cut the new sheet a bit bigger so it over laps but bend a flange/step in the sheet and pop it in from behind.

See this
thanks mate...yeah I'm trying to get a technique down before touching the car, hence I bought extra sheets of 2mm sheet to practice on,.my only worry with overlaps is getting access for seam sealer to cover the joint...
 

Duncodin

Zorg Guru (III)
Supporter
Joined
Sep 8, 2021
Points
139
Location
Pontrhydyrun
Model of Z
Z3 M44
thanks mate...yeah I'm trying to get a technique down before touching the car, hence I bought extra sheets of 2mm sheet to practice on,.my only worry with overlaps is getting access for seam sealer to cover the joint...
Inner sill have lots of openings. I'd squirt a ton of waxoyl inside.

What I mean is that you're getting ready to weld inner cills. You can't seam seal inside there anyway. So small overlap makes welding tons easier, fewer blow throughs, then paint tbe outside first and when the paint is dry soak the inside with waxoyl
 
Last edited:

IainP

Zorg Guru (II)
British Zeds
Joined
Feb 20, 2019
Points
119
Location
Out of my Tree, North of Perth, Scotland
Model of Z
1.9
thanks mate...yeah I'm trying to get a technique down before touching the car, hence I bought extra sheets of 2mm sheet to practice on,.my only worry with overlaps is getting access for seam sealer to cover the joint...
Magnets can cause the arc to wander Matt, I don’t go within 20mm of one, I’ll tack and then reposition.
If you overlap with 2mm you’ll need to up the volts as you’re no longer trying to weld 2mm at that point and the overlap acts as a heatsink.
From this pic I think you have the torch at too much of an angle, or you need to adjust the shade on the helmet to see the arc better.
IMG_5414.jpeg
The best is top left, but you want to see those welds overlapping slightly. Like 3,4,5 from the left. From the middle of the top onwards they wander off to one side, that usually happens if the torch is too heavily angled.
When you’re set up, do a cold travel pass, to check you can see, that the torch won’t hit anything and the cable won’t catch.

Also clean the metal surface until it’s shiny before you weld it, that’s new steel but it still has mill scale, varnish and/or oils on the surface, all of that gives the flux more work to do.
 

Matt Barnes

Zorg Guru (II)
Supporter
British Zeds
Joined
Jul 18, 2020
Points
123
Location
Portchester, Fareham
Model of Z
1998 BMW Z3 Individual 1.9 M44 B19
Magnets can cause the arc to wander Matt, I don’t go within 20mm of one, I’ll tack and then reposition.
If you overlap with 2mm you’ll need to up the volts as you’re no longer trying to weld 2mm at that point and the overlap acts as a heatsink.
From this pic I think you have the torch at too much of an angle, or you need to adjust the shade on the helmet to see the arc better.
View attachment 291177
The best is top left, but you want to see those welds overlapping slightly. Like 3,4,5 from the left. From the middle of the top onwards they wander off to one side, that usually happens if the torch is too heavily angled.
When you’re set up, do a cold travel pass, to check you can see, that the torch won’t hit anything and the cable won’t catch.

Also clean the metal surface until it’s shiny before you weld it, that’s new steel but it still has mill scale, varnish and/or oils on the surface, all of that gives the flux more work to do.
thanks Iain !.. good point about the magnets..never considered that.. you're like a forensic detective as yes my shade was too dark I was wandering off (much like when I was trying to weld that nut on the rear trailing arm!)...think I just need to practice practice practice...what I might do, rather than waste material, is to just cut slits in the plates and weld them up...once I get that sorted, cut bits out and weld them back in...might not be today as between the rain I need to fit an ABS pump to the Peugeot..😃
 

Matt Barnes

Zorg Guru (II)
Supporter
British Zeds
Joined
Jul 18, 2020
Points
123
Location
Portchester, Fareham
Model of Z
1998 BMW Z3 Individual 1.9 M44 B19
Loving where this thread is going (as someone fascinated by welding but never done it)
me too mate !! =)) ....though the advice on here is awesome especially @IainP. I'll get there.... I've just given up tackling the Peugeot as the ABS pump has the smaller equivalent of the bolts of doom... round Torx rusted in bolts. Too small and recessed for extractors so I'll have to drill them out. Not in the mood for that today, so put everything back for another day
 

Matt Barnes

Zorg Guru (II)
Supporter
British Zeds
Joined
Jul 18, 2020
Points
123
Location
Portchester, Fareham
Model of Z
1998 BMW Z3 Individual 1.9 M44 B19
Inner sill have lots of openings. I'd squirt a ton of waxoyl inside.

What I mean is that you're getting ready to weld inner cills. You can't seam seal inside there anyway. So small overlap makes welding tons easier, fewer blow throughs, then paint tbe outside first and when the paint is dry soak the inside with waxoyl
that's a fair point mate !....
 
Top