Bognor Lean-to Project

Duncodin

Zorg Guru (III)
Supporter
Joined
Sep 8, 2021
Points
139
Location
Pontrhydyrun
Model of Z
Z3 M44
Night time angle grinding….. what could go wrong?
What could go wrong? Last time I had a van parked outside your house the curtains of the house over the road were twitching non stop. We weren't being noisy either.

But angle grinding middle of the night? Surprised they didn't pull the pelmet down on their heads.
 

Mazza

Zorg Guru (V)
Supporter
British Zeds
The M44 Massive
Joined
Nov 1, 2017
Points
175
Location
Bognor Regis
Model of Z
Z3 1.9 M44 Roadster Z3 2.8 Project
Put the heater on in the garage this morning
4AE74A30-BB00-4768-A2BD-DF932C6A5A77.jpeg

while I had some toast :arghh: :arghh:…. No breakfast baguette here … should have gone to Zedshed HQ instead=))

A boring job but needs to be done….
So just got on with it….
Hacksaw and various tools of persuasion…
3DEF3D9B-F455-41C0-AF9F-F52218D935BC.jpeg

And thats just one insert…:whistle:
EF71FF94-E0B0-42D7-A23D-513385B75341.jpeg

25123474-2BB5-456B-BAD8-97E5EDD967BB.jpeg

And its as simple as that …..
The other one I used more brains than brawn and it was a lot quicker
15AB0142-4551-457A-B6D5-89B6A897CFA0.jpeg


Now the insert should slide down and you then screw in the last part!!!!

70BE11BD-D65C-41FB-A53F-201792FF50F8.jpeg


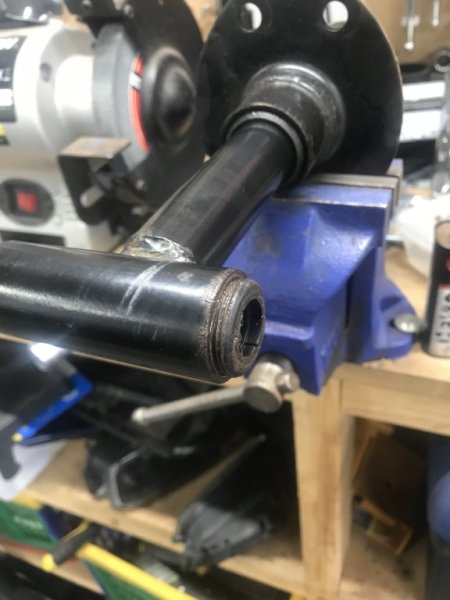
Thats as far as it will go!!!!!!!!


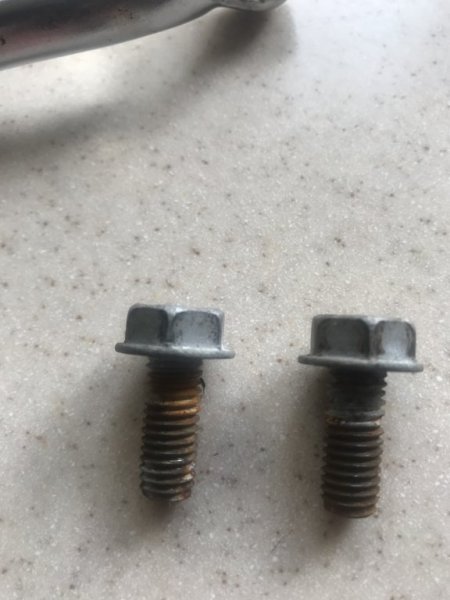
Two reasons…. Loads of rusty s*** in the bore!! And the bumper bolts have been over tightened, which has expanded the insert.
NOT a problem , when you have a mate with a state of the art lathe in his shed:whistle: who will tidy up the O/D so it fits properly.

Cleaned up the two M27 threads in the bumper mounts with a tap ( bought when I had a problem with the 1.9………. ok …….I smacked it and had to rebuild the front:whistle:=))

Another step forward ….

Next job is to make a carrier frame to support a bonnet on the roof of my Kia so I can collect all the panels from Andy
Roof bars attached… 😋
0462311F-57F4-483A-9787-FEB530F0EFBC.jpeg
 
Last edited:

Mazza

Zorg Guru (V)
Supporter
British Zeds
The M44 Massive
Joined
Nov 1, 2017
Points
175
Location
Bognor Regis
Model of Z
Z3 1.9 M44 Roadster Z3 2.8 Project
Today Another mini step forward…
The replacement window winder sliders arrived. The ones on the car were knackered!!
98F653C3-8DD7-42B3-9357-2E15DC5FE868.jpeg

Cheaper on line than Local Stealer this time!!


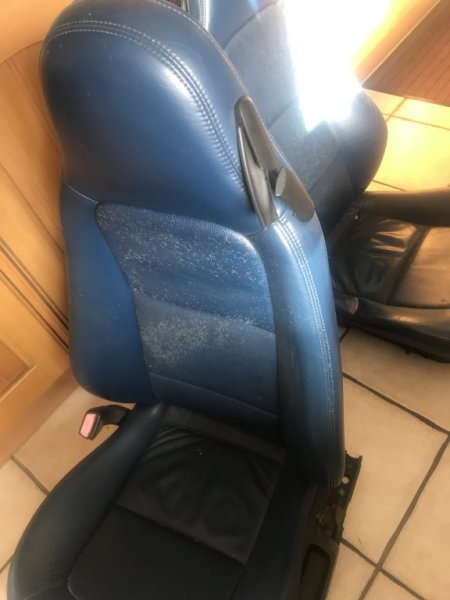
the seats have been in the shed … and looks like they had suffered !! Rust !!! And Mould :arghh:
B4EB1C51-81B2-44C9-A2DF-3933B08AA848.jpeg

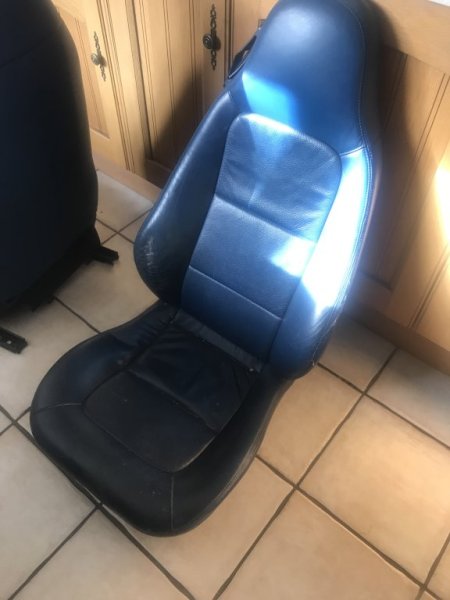
So it has to be done sometime so brought them in
77E0DD48-36CF-4DE1-91AF-B3D8FCF7A608.jpeg


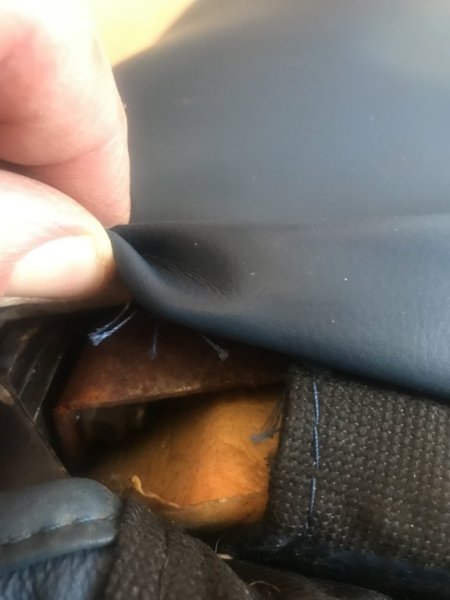
Found a bit of damage so will need to sort a repair of some sort :whistle:

The seats needed a clean…
4257402C-5482-4BC9-B5DC-A3CE049A5523.jpeg

5D20F780-6237-4E01-B54C-BFC232F8B4F4.jpeg


so about 20 min later….

57240EC6-831B-420E-A8D8-F332F4FC8BFF.jpeg

69773B54-E7FE-4370-B23F-76693EC88D2F.jpeg

So what expensive state of the art
did I use?? Autoglym?? no…..,
0863A52C-97DC-4A49-8F5E-D4648312C682.jpeg


A bit of colour restoration needed but I have some stuff that will hopefully improve this ..
1A093824-2206-45B6-8E19-490A045EBFE1.jpeg


Letting it dry over night (indoors) before doing anything more!!!!

What is this for ????
Didn’t seem to be connected to anything…
CF60F0AF-D319-4B77-B4D0-6FB970C7EA6B.jpeg

it was attached under the seat..
 

Attachments

colb

Zorg Guru (V)
British Zeds
Joined
Nov 25, 2012
Points
178
Location
Newport, South Wales,UK
Model of Z
Z3 M43 1.8 (1999) and Z4 E85 2.5 (2003)
Just checked out the part number on yours Malc using Realoem looks like yours has ended and replaced by
65776940191
Control electronics, seat occupancy
If you get a code for seat occupancy its more likely to be a duff pressure mat inside the seat rather than the module.
 

Jam03

Zorg Guru (III)
Supporter
British Zeds
Joined
Feb 21, 2022
Points
136
Location
Surrey
Model of Z
2.2i
Why do you need a sensor to tell you that someone is sitting in the seat - surely you will see them unless you are blind 😂😂 then you shouldn’t be driving anyway🫣
Some say that if you have the right software you can program it to monitor the passenger’s BMI and display it on the onboard computer.
 

Mazza

Zorg Guru (V)
Supporter
British Zeds
The M44 Massive
Joined
Nov 1, 2017
Points
175
Location
Bognor Regis
Model of Z
Z3 1.9 M44 Roadster Z3 2.8 Project
Not a lot today…. But felt I should do a bit :whistle:

So had a closer look at the bumper inserts and it looked as if the problem was a build up of rust…. On both the bumper supports and the salvaged inserts.
So armed with these….
10D79186-9A4C-48AB-BEA2-298359F724B8.jpeg

Dremel with extension and little grinding wheel, and a 25mm flapwheel, I set about derusting both parts…..an hour and half later I had one covered in antiseize copper grease and working as it should.
51A57F96-5B7A-4C86-A8CB-311C6DBFDCAA.jpeg

They push in from the thread end… and the the last bit screws in. You use a 14mm hex from the bottom normally, but it just screwed in using my fingers
EA785F32-3626-42F3-B1AD-7CBEA7B0285F.jpeg


One down one to go….
You can see the build up of rust in the bore
A0E54CC3-BE7C-48BE-94CE-2CB89F903510.jpeg


Which is why they didnt work and there was never any chance of removing them in the normal way……

I’ll finish this one tomorrow , after I have bought another grinding wheel for the dremel:whistle::arghh:
 

Attachments

t-tony

Zorg Expert (II)
Supporter
British Zeds
#ZedShed
Joined
Dec 31, 2013
Points
226
Location
Torksey Lock,Lincoln, England
Model of Z
E89 Z4 23i Auto
Nice job Malc.

Tony.
 

Mazza

Zorg Guru (V)
Supporter
British Zeds
The M44 Massive
Joined
Nov 1, 2017
Points
175
Location
Bognor Regis
Model of Z
Z3 1.9 M44 Roadster Z3 2.8 Project
Well went to buy the dremel grinding wheel and it was a perfect 25mm fit… cleaned out the bumper support so then did a bit of derusting on the bit where the towing eye attaches and will clean and spray it satin black .
No pictures today …. Phone was on charge😂😂

John Wayne film on telly this afternoon so other than ordering a blue leather repair kit, and a set of heat pads, (to do the heated seat conversion) during the ad breaks did absolutely nothing :whistle:

I have worked out a full days plan for tomorrow ….. but that will depend on my hangover when I wake up :whistle::drinks:
 

colb

Zorg Guru (V)
British Zeds
Joined
Nov 25, 2012
Points
178
Location
Newport, South Wales,UK
Model of Z
Z3 M43 1.8 (1999) and Z4 E85 2.5 (2003)
You should manage the seat strip to put the new heat pads in, just make sure you have a supply of Hog Rings and the insertion pliers to close the rings up. Some people use zip ties instead of Hog Rings, I went the Hog Rings route when I put pads in my seats on the Z4.
 

t-tony

Zorg Expert (II)
Supporter
British Zeds
#ZedShed
Joined
Dec 31, 2013
Points
226
Location
Torksey Lock,Lincoln, England
Model of Z
E89 Z4 23i Auto
When used to strip seats in Chrysler card I used to cut the old hog rings off and make new ones from 1/16" mild steel ending rods. By bending the ring using pliers and the length of the welding rod. You got a good tight bend then cut it off next to the ring and on to the next one.

Tony.
 

Mazza

Zorg Guru (V)
Supporter
British Zeds
The M44 Massive
Joined
Nov 1, 2017
Points
175
Location
Bognor Regis
Model of Z
Z3 1.9 M44 Roadster Z3 2.8 Project
First job today was to repair the tang on the passenger seat.
03CFE55E-66B8-4819-A218-1C704E73975F.jpeg

The one on the left has been snapped of at some point in its life…..
So the repair was to file down the broken piece , make a right angled plastic bracket and glue it into position…..
3E9998BC-06BF-43B8-B880-03F72283BE6B.jpeg


Its wider underneath to give it more strength

and the source of the bracket??
7250D02B-977F-43B9-85F7-8F17D21164FA.jpeg

A drainpipe bracket.
Once it was holding ok … I added a bit more glue on the back
8CE0884C-61C2-41CE-8B50-643573C21691.jpeg

it will be sitting there now overnight to really harden off. But seemed to have worked ok.

Next . Warmed up the garage and sprayed the bumper support.
56B893DF-828A-4441-9604-73DDC7819FC3.jpeg


So on to the seat bases….
F5498652-91C2-45D3-9629-55B3EF8DBDED.jpeg

Derusted , cleaned and painted where needed.

So on to the seats themselves…..
Remove two studs… useful having the right tool
C2D56492-3EBD-4BBF-A7F0-A9B660D96DF0.jpeg

2559DF64-60A9-4156-BDD7-C594C486F219.jpeg


Doesnt have hog rings just metal tabs so carefully bent them just enough to slide out the seat cover.
11F2A095-0A01-4382-B21A-8B55F86C0222.jpeg

Then squeeze the seat to be able to unhook it
D95B5C82-DF02-4C94-B79A-B9B146E235D4.jpeg


and found this …..
6E7A2E74-667F-4B3B-8440-B6501F42A55B.jpeg

The seat occupancy membrane. But don't think it works as it wasn't connected, and there was another dummy plug in the unit where it should plug into????


Then the task of removing the seat cover…. Its a pain as its glued to the base foam and you have to be careful as you separate them.
The bottom part and the rear seam unclip
1A7C83F0-09D0-47F6-BC06-DB648D1514AB.jpeg

D06A6D38-B774-41D5-9B1D-7E27BEE7D457.jpeg


And after about an hour
8CB051F0-1E9F-47FE-9404-C43D33CD77FA.jpeg

The blue stuff is the glue.
At least it came off will only some minor ( repairable) issues. :whistle:
Base is done in the same way.
162BBFFD-9E76-45C4-B152-B3840C9F37A7.jpeg


As the frame is so rusty I had to remove two metal hog rings that hold the foam to the frame
35B808AE-58A4-4851-BB61-60506D5486DE.jpeg

3AB41E1B-7543-4766-8FAD-F8E3963B209E.jpeg

B5A855CA-F1B2-4849-A810-10DEA67E55C5.jpeg

D46BED38-778E-49D3-9BCA-D4A0B4B04C46.jpeg


Seat for Z3 ( MadMaxEdition)
B4A1CEA2-FC92-490D-80A0-765E1A80B22E.jpeg

and with two bolts and two spirol pins removed, the frame separated to make it easier to work on.


3FCCF1DA-4F40-4621-9006-6F89A6F3C818.jpeg


Now have to do it all again on the other seat :arghh:

Oh yes… I did remove the broken seat guide by cutting off the plastic lugs to save damaging the two grip washers that holds them to the seat. I’ll put the new ones on once the leather has been cleaned.
98E866EB-5F17-4321-BAFF-38F1D583491E.jpeg


and an infiltrator hiding in the seat!!!
500668D6-32AA-4103-88B4-D26F199A8BB1.jpeg
 

Mint

Zorg Expert (I)
Supporter
British Zeds
East Anglian Crew
Joined
Sep 23, 2012
Points
222
Location
Stafford
Model of Z
2.2 & 3.0 Sport
...The seat occupancy membrane. But don't think it works as it wasn't connected, and there was another dummy plug in the unit where it should plug into????...
Yes Malc. As the seat occupancy sensor mat was [probably] open circuit, the air bag self test would fail and illuminate the air bag light on the dash. The dummy plug simulates the sensor mat so the air bag light doesn't illuminate. It does mean that in the event of an accident the passenger air bag will go off even if there is no one sitting in the passenger seat. HTH
 

Mazza

Zorg Guru (V)
Supporter
British Zeds
The M44 Massive
Joined
Nov 1, 2017
Points
175
Location
Bognor Regis
Model of Z
Z3 1.9 M44 Roadster Z3 2.8 Project
@Mint Should there be a circuit if I buzz out the connector?

If not ....might as well remove it as it is not actually doing anything =))
 

Mint

Zorg Expert (I)
Supporter
British Zeds
East Anglian Crew
Joined
Sep 23, 2012
Points
222
Location
Stafford
Model of Z
2.2 & 3.0 Sport
Testing towards the mat should show some resistance. No idea what it should be but if it's open circuit it's definitely dead and why there is the dummy plug there;)
 

Mazza

Zorg Guru (V)
Supporter
British Zeds
The M44 Massive
Joined
Nov 1, 2017
Points
175
Location
Bognor Regis
Model of Z
Z3 1.9 M44 Roadster Z3 2.8 Project
So today was a long day … started with a drive up the A3 to watch An under 15 footy team that I have sponsored. Then after the game further up the A3 to our resident breaker. (@spurs fan in a coupe )

and collected all the panels in Topaz to fit to my project. One issue with one of the panels…but can be overcome with a bit of lateral thinking … and some plug welds =))
I will document that later.
Wrapped up the panels snd put them in the Kia…. All except the bonnet !!!

471853BD-56FA-47D1-B05F-39C1F28190F1.jpeg

That went on the roof on a frame I made.

Never moved over the 50 odd miles home:thumbsup:

And all parts now safely in the garage ready to be assembled
FC06C465-83C4-4953-AD7D-1B95A9DF51E9.jpeg


And frame for hire !!!!!=))=))
A7CD47ED-689A-4195-98B0-3E65326A3BCD.jpeg


And the next generation of breakers is already in training as Andys eldest son wields a nugger gun like a true professional.
 
Top