Seemed like a good idea at the time!

IainP

Zorg Guru (II)
British Zeds
Joined
Feb 20, 2019
Points
119
Location
Out of my Tree, North of Perth, Scotland
Model of Z
1.9
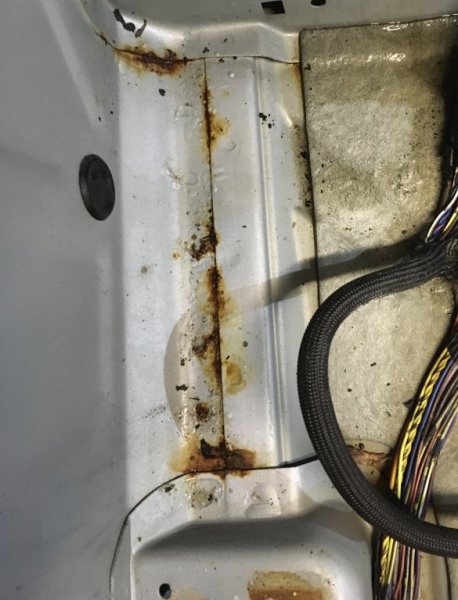
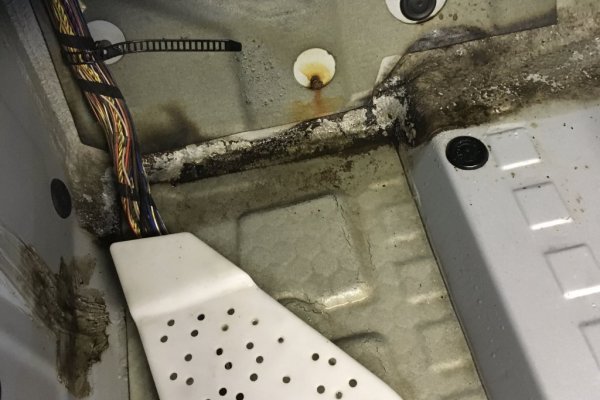
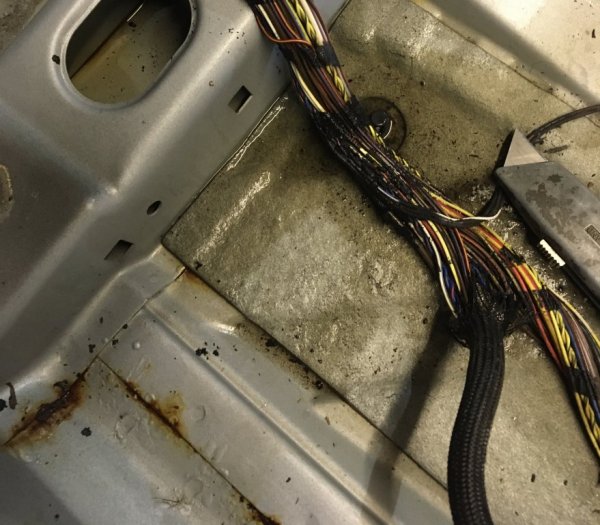
Lots of stuff going on, next to no time, blitzed it yesterday. Eventually got the passenger seat out to get the rear carpet out. Completely sodden.
Thefront seemed fine until I reached ina but. I ended up splitting the front into two. Front has a puddle.
1E9FFB94-659C-4798-B2C5-D229A64947BA.jpeg98768843-1B9C-473D-A1EF-0F5206176A46.jpeg08A8A2F9-F0BE-41E9-84C9-8C37900D52D6.jpeg
Thankfully, all the black is just dirt, rubs straight off. Only those patches of rust and those are just surface, Jenolite will sort those. Big tin of Hammerite required.
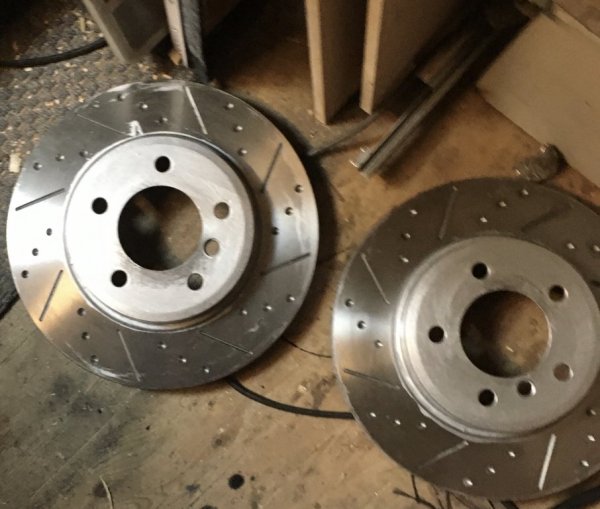
Painted the discs
73F359B5-7631-4F38-8510-9647367CFC67.jpeg
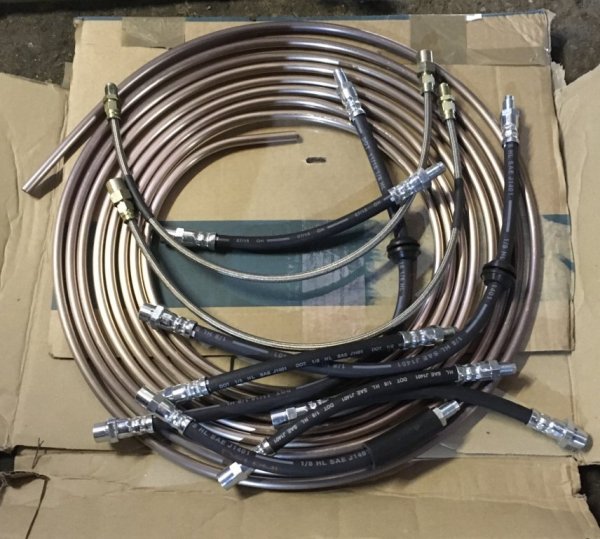
All of this needs fitting.
3CF6AF62-7328-452C-A268-7A3C9EBAA120.jpeg
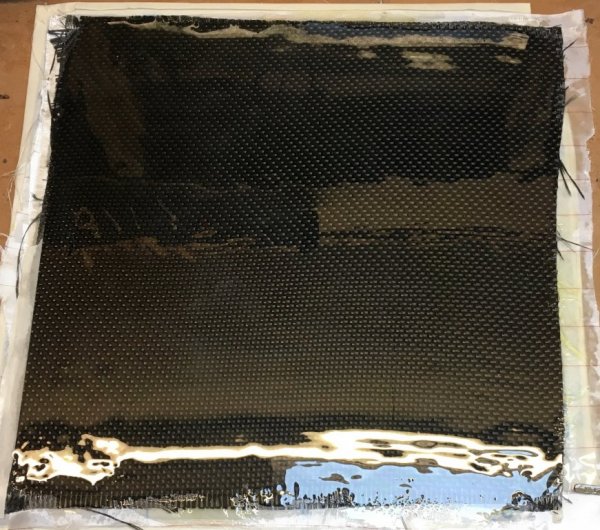
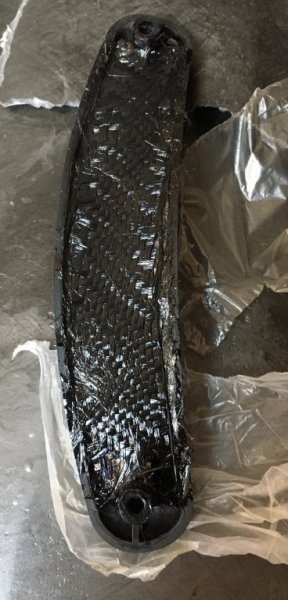
layed up some carbon sheet for the headlight surrounds. Hopefully get it flatted and polished tomorrow.
43296FA5-AE99-452D-90A1-C30412DF1DEB.jpeg
 

IainP

Zorg Guru (II)
British Zeds
Joined
Feb 20, 2019
Points
119
Location
Out of my Tree, North of Perth, Scotland
Model of Z
1.9
Things getting crappy on the healthcare front so only been getting snatched hours on this.
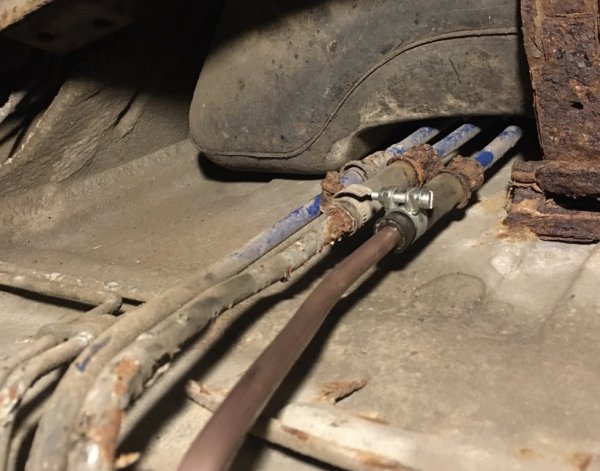
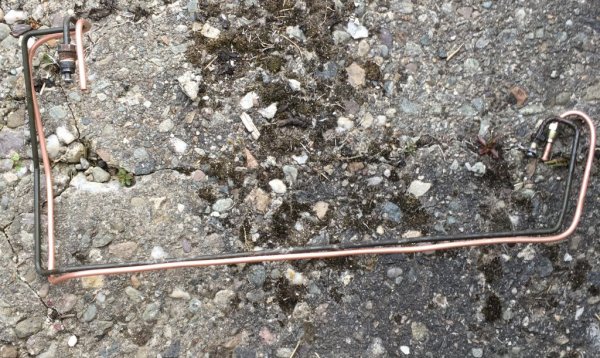
Now have to get it mot’d or moved ASAP. Bit of a challenge there as it currently has no interior, the seats are stripped to the frames, there are no lights, the fuel lines and the rear brake lines need changed.
976307C2-0ED6-4251-A012-2131582C866E.jpeg
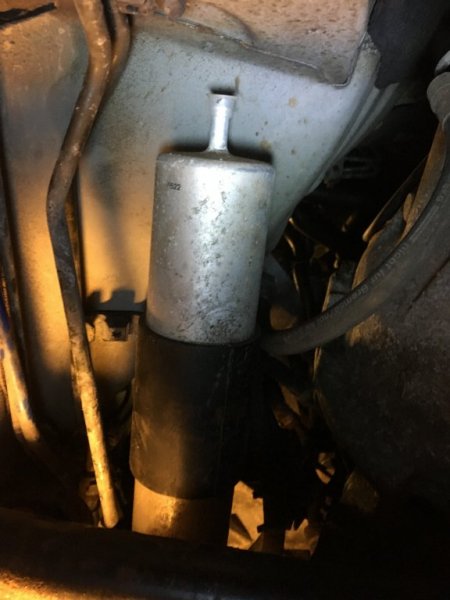
The fact Bmw crosses the fuel lines over pisses me off. I’ll be relocating the fuel filter to fix that, ditching the standard filter for the same type we already have on my sons cars. Fits an Ignis Sport, Ford, Volvo.
072CFA7C-7D23-4679-90E9-D989ED4E9B80.jpeg
04B3E4F7-33A8-4A0A-A2A2-E8266A1406AB.jpeg

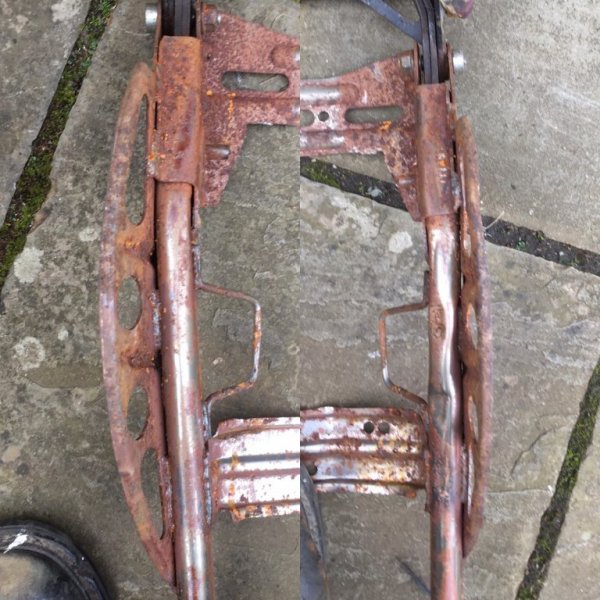
While the seats are stripped, I decided to squeeze in the side bolsters in the driver seat with the help of a large bar. Needs a good paint.
ED1E7E5A-673D-499B-8B16-C17BC5DCD65D.jpeg
 

IainP

Zorg Guru (II)
British Zeds
Joined
Feb 20, 2019
Points
119
Location
Out of my Tree, North of Perth, Scotland
Model of Z
1.9
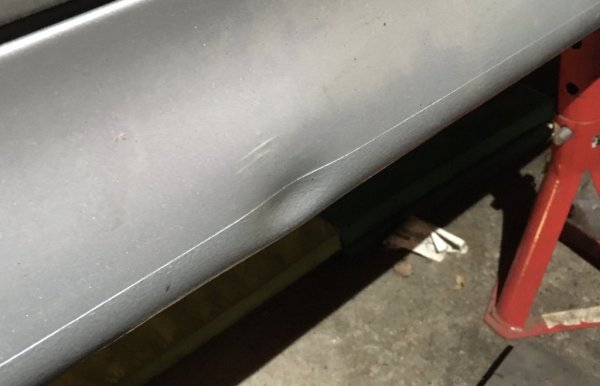
Every time I crawl under/out this car that dent in the drivers sill gets more and more annoying.

0F99DA2C-B528-40BF-9717-B83C7231681C.jpeg

The rest of the car is covered in chips, scuffs, scrapes, the bonnet has, I think, been walked on, so it fits right in. But, it Really annoys me, don’t know why, so, as soon as I get it mot’d and back up the road the sills are coming off and I’m fixing it.
 

IainP

Zorg Guru (II)
British Zeds
Joined
Feb 20, 2019
Points
119
Location
Out of my Tree, North of Perth, Scotland
Model of Z
1.9
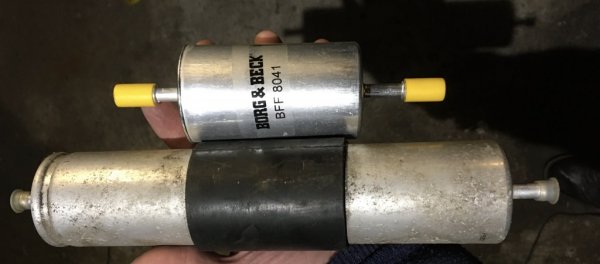
This is the fuel filter I’m converting to.
DCE3E07D-F263-44B3-B6D8-64D64D82C61C.jpeg

No, it’s not too small, already running on my sons Tourings for a couple of years. They’ll just need changed more often than every 20 years like the old one.
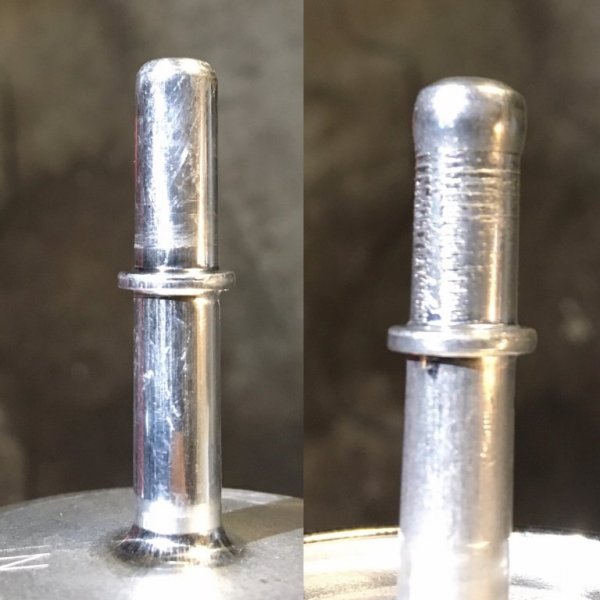
Like the OE filter it has plain ends, most aftermarket ones have flairs. Luckily I have a flairing tool. Sorted.

C8B48897-49EB-47A5-8E1B-8307B48FDF5A.jpeg
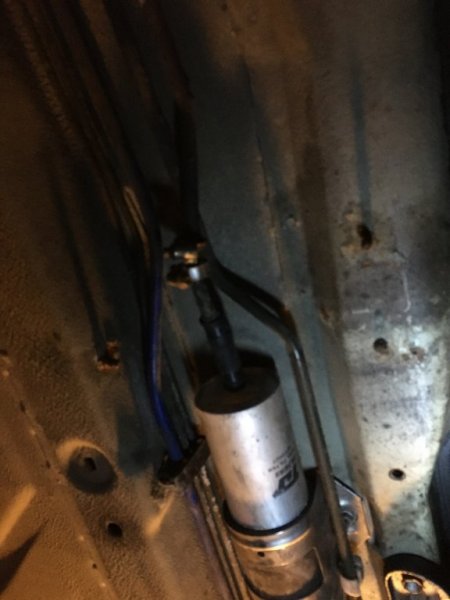
It now fits in there, no possible chance of tearing it off, and yes, you can tear them off, the Stance guys learn that the hard way. Those new kunifer lines are much more pleasing, both the pressure and return lines were actually very poor condition on the back of the 90 bends, which couldn’t be seen, I quite easily collapsed both. The rivnuts are for a composite cover I’ll make after I get back up here.
And those pics are useless, something smeared on the lense I think.

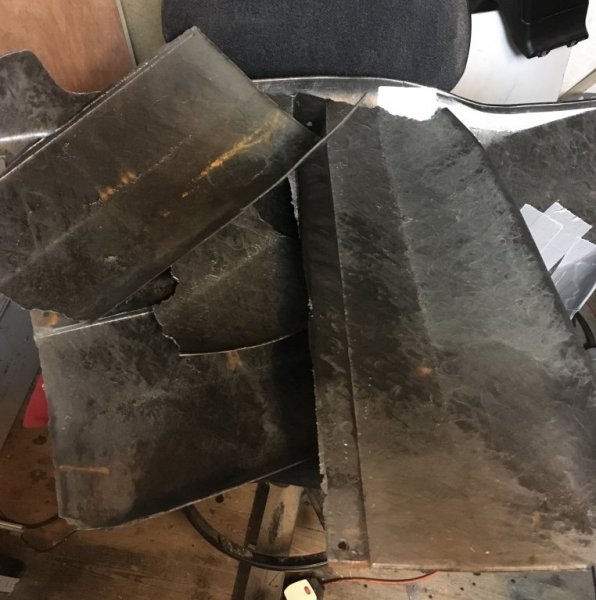
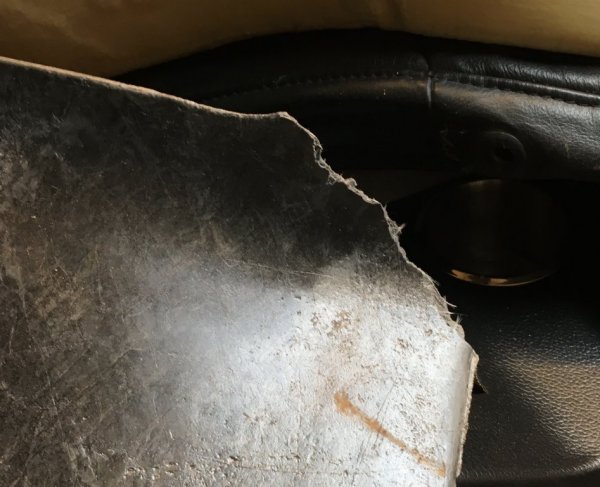
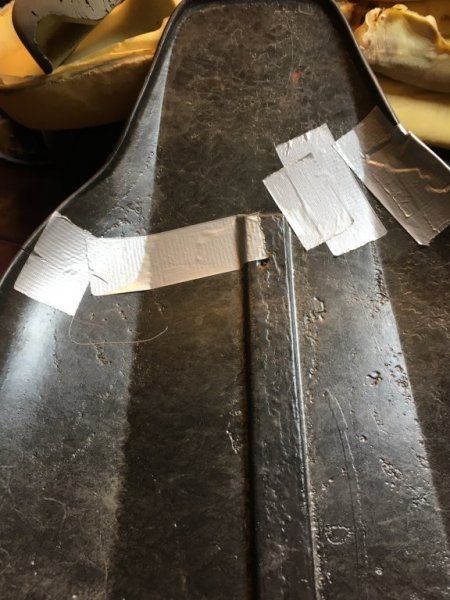
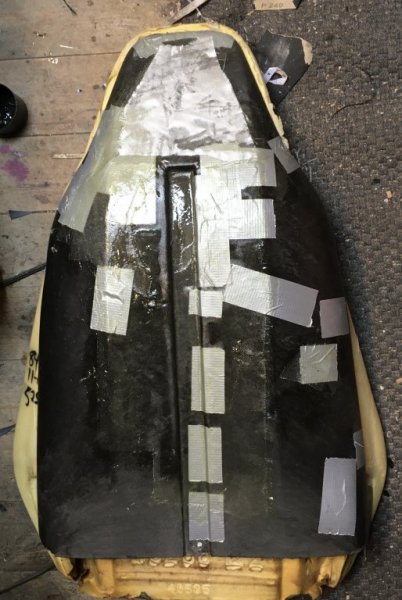
Starting to build the seats back up, these stiffeners had both come to bits, that stuff has gone very fragile. From the state of one, something has been carried behind the seat, there were big dents and cracks in it even before I tried to take it out.

F05687FF-927B-49A4-BD3B-B3898E9E4D70.jpeg5287CB69-CD71-4A23-9ABB-B84F04D44FB2.jpeg
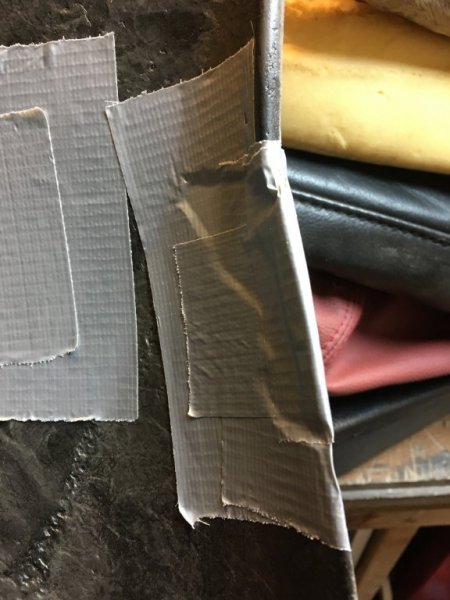
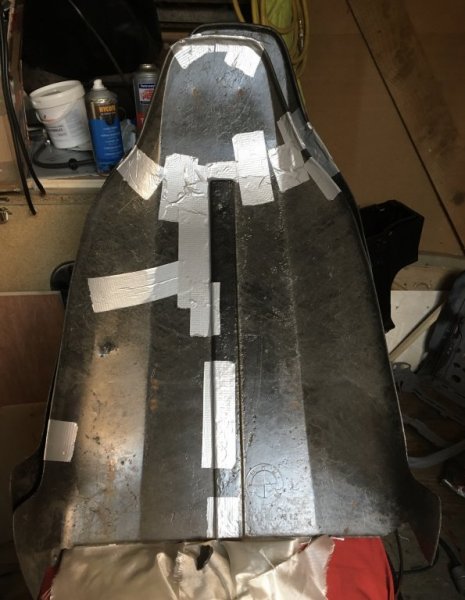
In this sort of situation, gaffa tape is your friend. And patience. Sometimes easier to tape the end of one piece, which lets you use that as an anchor to lever and line up the rest. Small missing bits/ holes can just be taped over, if you need a rolled edge, roll a tube of tape and add.

88D95897-A3C5-4D23-889C-0C1BE3E159DC.jpeg8A0C3279-B5CB-4C0C-906F-2E377E164222.jpegCEA87509-449E-4D2C-85EF-27625D289D24.jpeg
I have no idea what this stuff is, I checked it with some acetone and it scared me, so I’m not putting styrene resin anywhere near it.
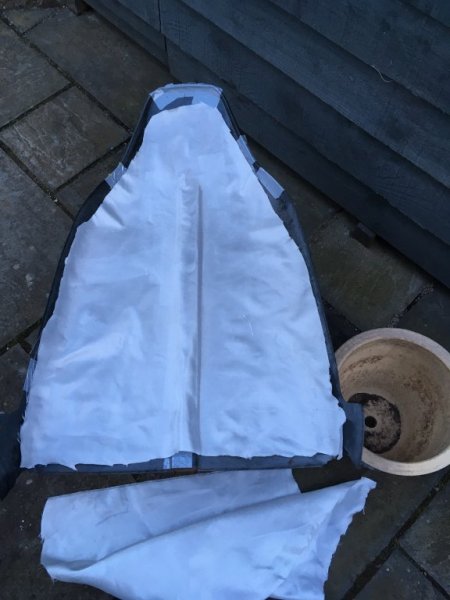
Mixed up a little fast epoxy resin, 8-10 mins working time. I keep all my fabric offcuts, useful for awkward little repairs like this. Paint on resin, add fabric, stipple in more resin, when you’ve fully wetted out the fabric it changes from white, the bit at the top, to almost transparent, most of the rest. For something like this, one layer of cloth, in this case woven fibreglass, is more than sufficient. I’d have just done it on the inside but this was in 6 pieces and split right down the middle so I’ve used the foam as a support. I’ll add a layer on the inside on Friday night, hopefully brake lines tomorrow night.

E20D99E9-177B-4031-8FE4-9CA14DD3CE9C.jpeg
 

IainP

Zorg Guru (II)
British Zeds
Joined
Feb 20, 2019
Points
119
Location
Out of my Tree, North of Perth, Scotland
Model of Z
1.9
I’ve managed an afternoon off, amazing to work with the garage door open. Even more amazing that it says 15C on my Clio dash, usually it’s 2 or 3, so no need for 5 layers of clothing
New fuel lines tight to the floor, I’ll add a couple of plastic pipe connectors so they don’t actually make contact.

70F9016F-067F-430F-B722-D75E54EAB0D4.jpeg

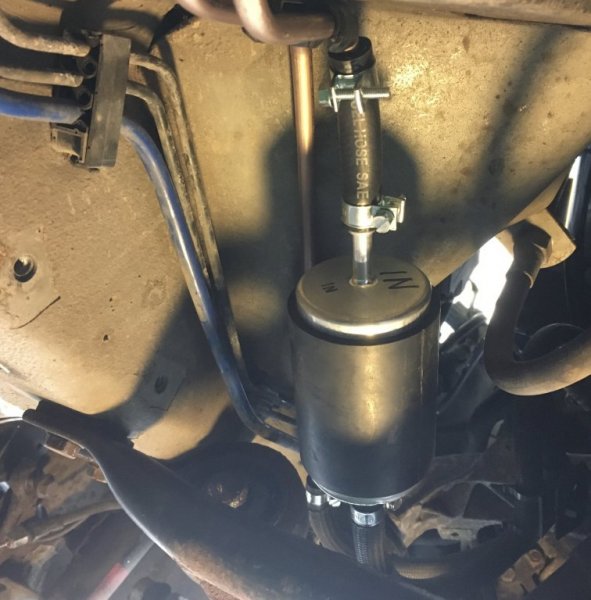
The fuel filter tucks up there above the x brace. I make a little alloy bracket to hold it using those 2 M6 holes, or I would if I’d remembered to bring it.

81D6922C-4B24-48C7-9D39-867AA3DB1696.jpeg
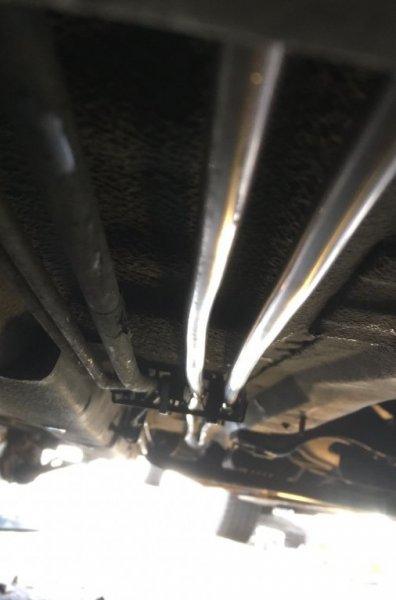
Speaking of the x brace, that’s going in the bin, now there’s light in the garage it’s obvious it’s a potential sump killer. I’ll be making my own with a composite sump guard.

image.jpg
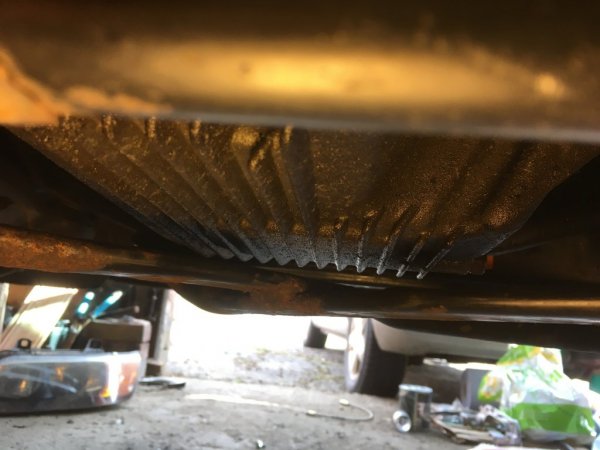
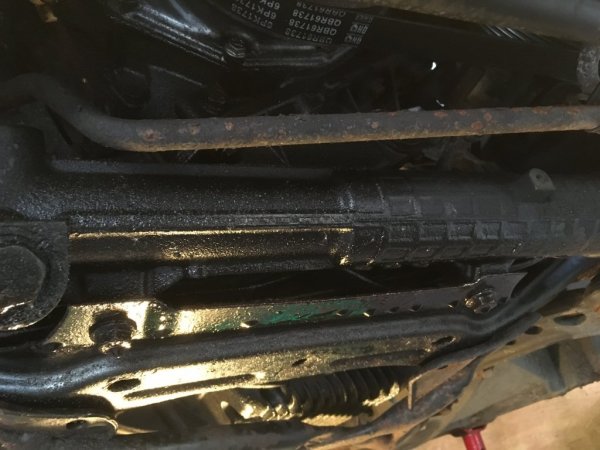
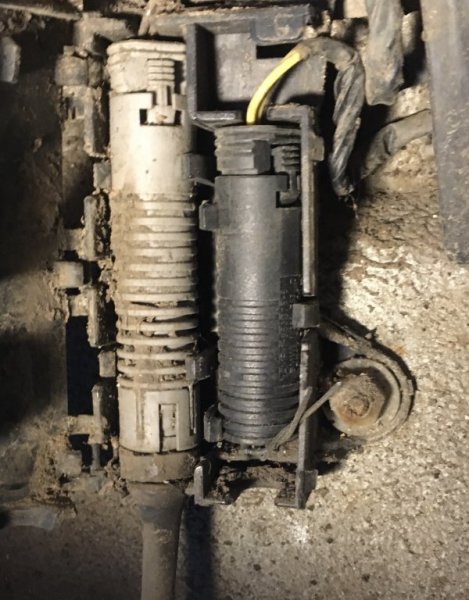
I have several oil leaks too, I think partly engine, partly steering, bugger.

image.jpg
 

IainP

Zorg Guru (II)
British Zeds
Joined
Feb 20, 2019
Points
119
Location
Out of my Tree, North of Perth, Scotland
Model of Z
1.9
When I got it the pads were through to the metal, no lights on the dash, so I thought no wear sensors. Nope, lazy b*****d just cut the wires, I mean, ffs, he had to open the panel to tuck the bloody wires inside, why not just pull the connector?
B5020053-C7C4-4BFD-9A8E-335E43D2F9C7.jpeg
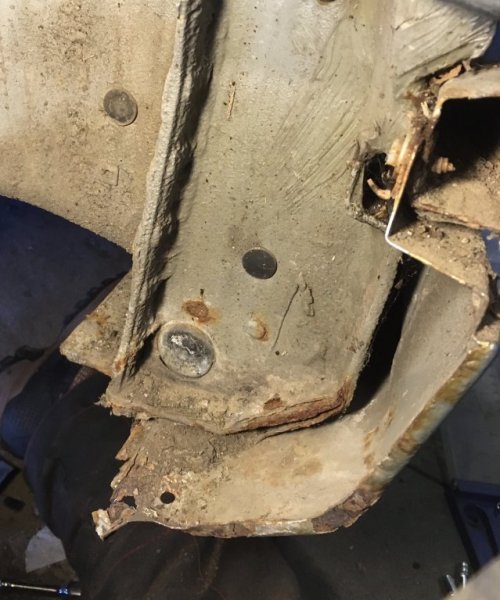
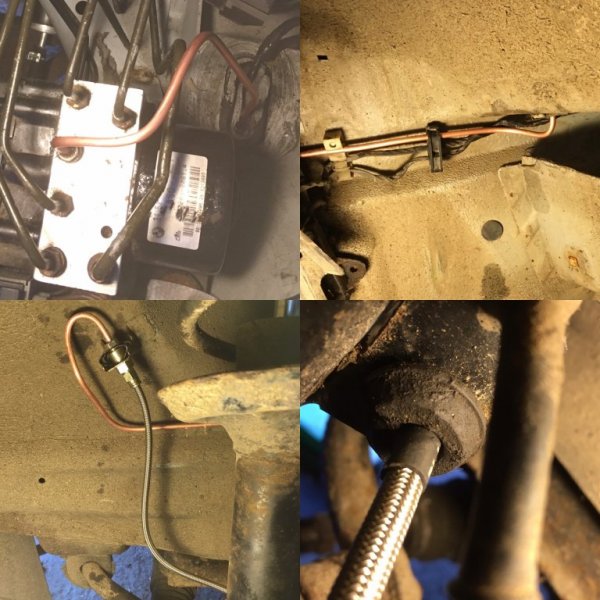
Hard line was acceptable, just about, but I had a new flexible, so, off with the arch liner. Sills are defo coming off for a clean later, need a little attention now rather than a lot in a year.
B279A48A-60BE-4752-B65A-DF3E8013D8F8.jpeg1F43427B-ECA2-404D-8743-2C99343DF1AE.jpeg
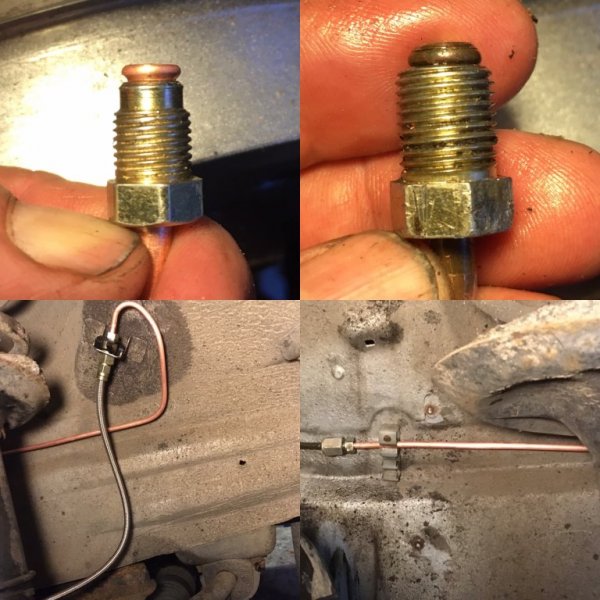
Bendy bendy, takey timey and voila! I reused the 12mm end, the ‘12mm’ ends I brought with me turned out not to be metric because I obviously put them in the wrong box. Knob. Just as well I noticed before making the line up.

27B6F86B-30C3-4D2B-AF67-4EB6D6F24B1C.jpeg7A6A790D-CE03-4177-8B58-2120E7B77A63.jpeg
I only have stainless fronts, a cheap eBay find. Four new rubber ones for the rear. I could have put a junction behind the liner so the engine bay looked standard, but it’s only a short line and it’s just as much work as replacing it. I’ll put a joiner in the driver side though, can’t be arsed chasing that through the engine bay and it’s not bad condition at all really.
 

t-tony

Zorg Expert (II)
Supporter
British Zeds
#ZedShed
Joined
Dec 31, 2013
Points
226
Location
Torksey Lock,Lincoln, England
Model of Z
E89 Z4 23i Auto
When I got it the pads were through to the metal, no lights on the dash, so I thought no wear sensors. Nope, lazy b*****d just cut the wires, I mean, ffs, he had to open the panel to tuck the bloody wires inside, why not just pull the connector?
View attachment 178505
Hard line was acceptable, just about, but I had a new flexible, so, off with the arch liner. Sills are defo coming off for a clean later, need a little attention now rather than a lot in a year.
View attachment 178507View attachment 178509
Bendy bendy, takey timey and voila! I reused the 12mm end, the ‘12mm’ ends I brought with me turned out not to be metric because I obviously put them in the wrong box. Knob. Just as well I noticed before making the line up.

View attachment 178511View attachment 178513
I only have stainless fronts, a cheap eBay find. Four new rubber ones for the rear. I could have put a junction behind the liner so the engine bay looked standard, but it’s only a short line and it’s just as much work as replacing it. I’ll put a joiner in the driver side though, can’t be arsed chasing that through the engine bay and it’s not bad condition at all really.
If you still need a pad wear wire I have a couple left.

Tony.
 

IainP

Zorg Guru (II)
British Zeds
Joined
Feb 20, 2019
Points
119
Location
Out of my Tree, North of Perth, Scotland
Model of Z
1.9
Right, I’m blaming it on the continual interruptions by neighbours asking after my father in law, and not on my advancing age, (60), or outright stupidity. And the fact I don’t use joiners much. Excuses, excuses.
Could I get the junction to thread, No, not a freaking tall. On, off, blanking ends on, definitely not cross threaded, much head scratching later it eventually dawned on me I’d picked up the wrong end. When joining pipes you need to use a union threaded all the way to the end. Muppet schoolboy error.
I hate brake fluid.
73CEF065-9E12-4828-9D18-CE5FDB59FC4A.jpeg
At least that’s the front done, I had hoped to have the whole lot done, but can’t really complain about the interruptions.
 

IainP

Zorg Guru (II)
British Zeds
Joined
Feb 20, 2019
Points
119
Location
Out of my Tree, North of Perth, Scotland
Model of Z
1.9
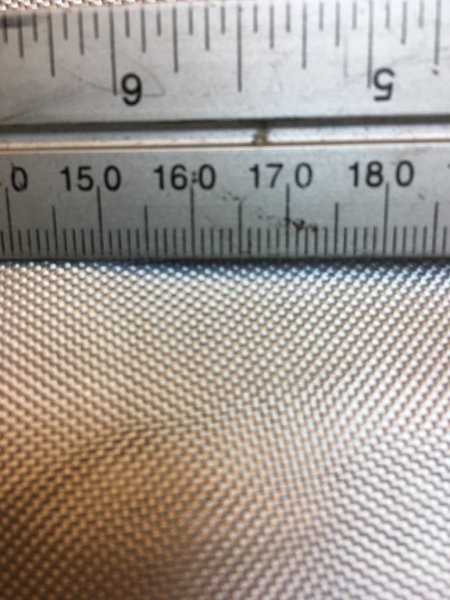
This is woven fibreglass cloth, cheap, easy to cut and conform and it’s only 0.1mm thick so it doesn’t add bulk, yet once cured it’s super tough.
C2C17ADB-0BFD-4334-9F88-72BE5797D6A9.jpeg82B1B7EB-04BB-4967-B61C-D67E45828CE4.jpeg
Works with all resin systems, plain old styrene resin is the most widely used with it, and cheapest. Styrene is a pretty good solvent though, use it on the wrong plastic and you’ll quickly have a softened or gooey mess, if you’re really unlucky, a puddle on the floor.
ALWAYS check, I applied a little to one of the scraps, didn’t dissolve, but it went a little soft.
Epoxy resin is much more expensive, but it doesn’t turn whatever you apply it to into sludge. Do mix exactly to the instructions, some are by volume, some by weight.
 

IainP

Zorg Guru (II)
British Zeds
Joined
Feb 20, 2019
Points
119
Location
Out of my Tree, North of Perth, Scotland
Model of Z
1.9
Ah, didn’t think of that, cheers, I’ll remember it for future use. Likely been much faster. Have both done now so can start building them up.
Have you considered diolen cloth? I think that can go as low as 80g per metre, used a lot in snowboards and watercraft due to its toughness and flexibility.
 

IainP

Zorg Guru (II)
British Zeds
Joined
Feb 20, 2019
Points
119
Location
Out of my Tree, North of Perth, Scotland
Model of Z
1.9
I get most of my stuff from Easy Composites, lots of others recommend East Coast Fibreglass. If you ever want to go to vacuum bagging, let me know, just about to rescue some spare vacuum pumps from work, as well sitting in my shed as a skip.
Righty. As I sit here with a beer.
D1FB2B03-53DA-49B7-AA78-81DA5F3D0510.jpeg
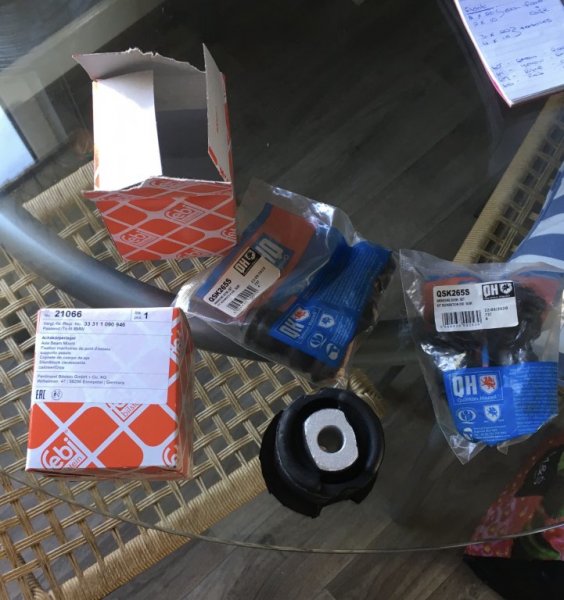
Mounts/bushes arrived, be a mad weekend to fit them.
419792EB-1521-43A5-B54E-7B8755500970.jpeg
Before I build the seats up I thought I’d better sort out a pair of fire extinguisher mounts.
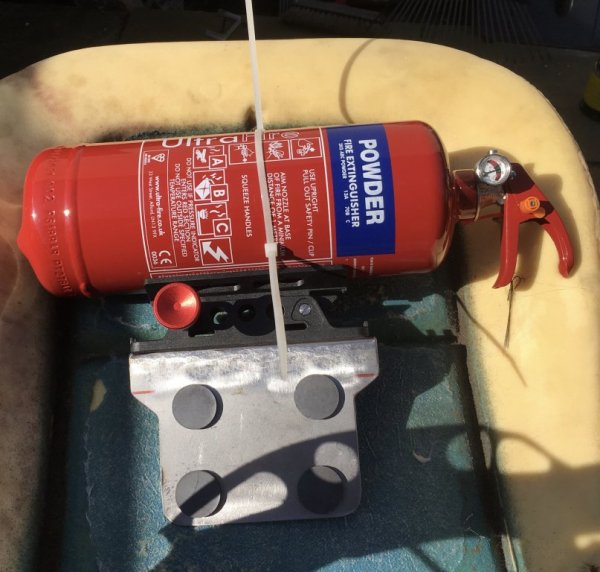
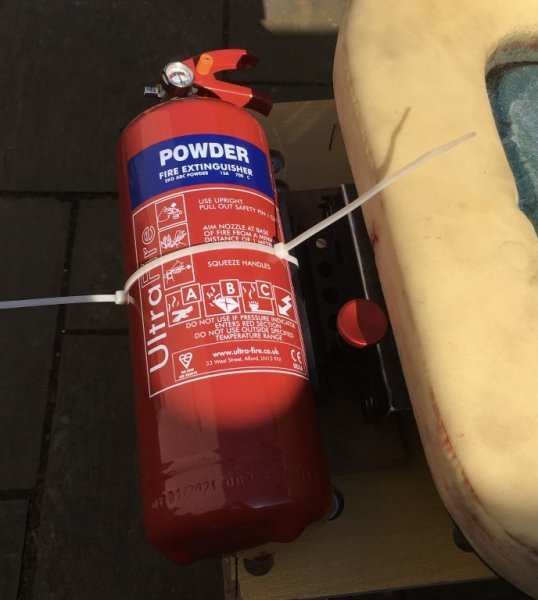
Standard ones are still available, not something you ever want to use, but if I do, I want a gauge so I know if it’s lost pressure and more than the 6 seconds of the 850g standard one. A 1kg gets about 8-10 sec, but I got a deal on a 2kg. Big fecker for the front of a seat really.
BE12CDB9-096B-4E0A-8E02-15A203404C2D.jpeg
9753D899-3201-49FD-9DA7-A2D19FF3EEE7.jpeg
The mount is from China, some sort of plastic, not up to the job so ordered an alloy one. The plastic/nylon or whatever it is mount can go on the passenger seat, that’s getting a 1L AFFF (foam) bottle. The four round things are magnets, easiest way to line it up.
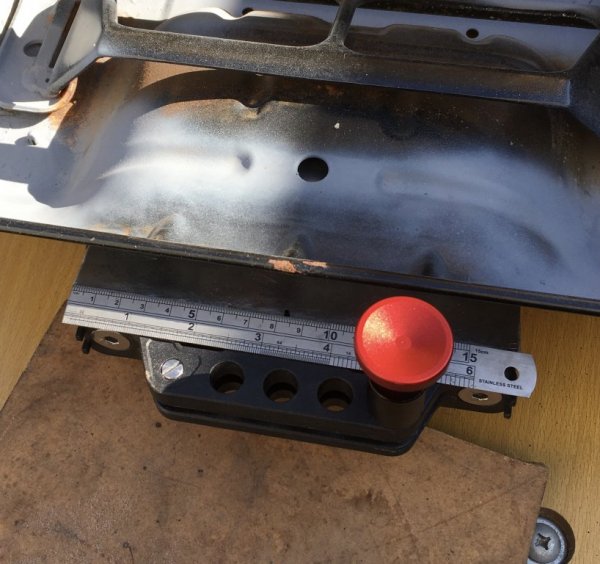
1BDA4871-6E12-4569-9A6D-B9F5366EB06C.jpeg
Measure, measure, measure.
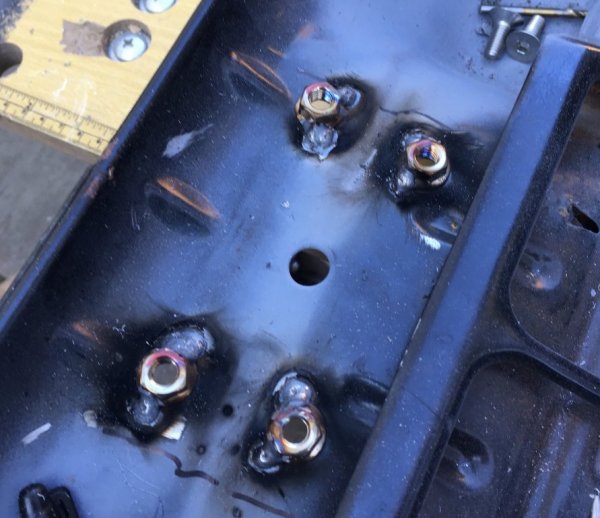
Pilot holes, check, bigger holes, check it again, final holes, line up some stainless flange nuts. Weld.

88328BFF-1E16-42FA-BF2F-B10DFC1D9DBF.jpeg

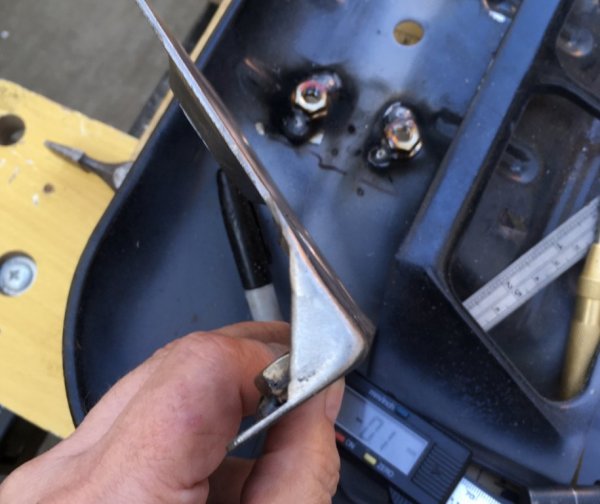
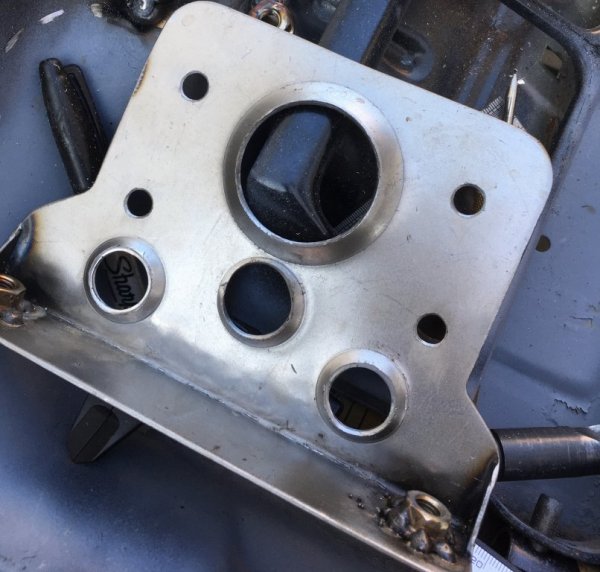
Last thing I need is the bracket bending if I ever have a stop dead shunt, filled in the ends and dimple’d it for flash, just ‘cos. Haven’t used the dies for ages and seem to have misplaced one, tried to use the smaller one but it went off center, annoying.
671725F6-3E73-4C42-82C2-496C080FB349.jpeg
F0683042-AE81-4745-AE24-ADEDD28E90E8.jpeg
I’ll polish the edges and paint it tomorrow with the seat.
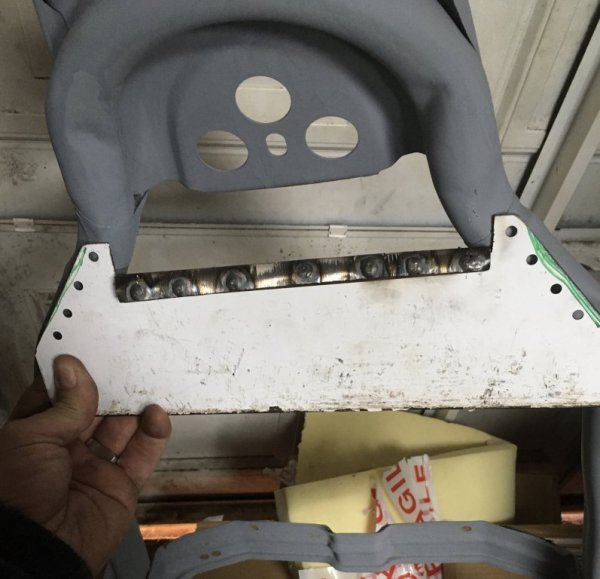
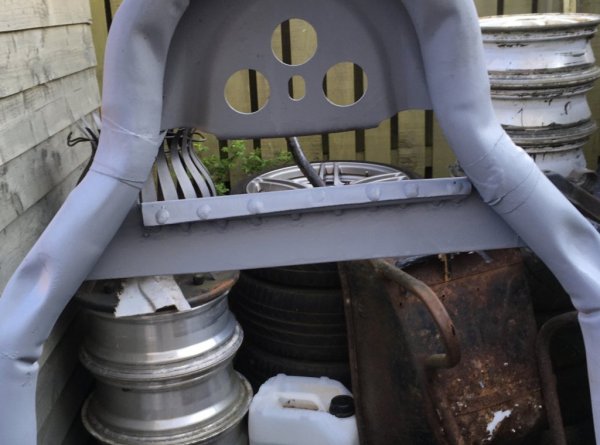
Speaking off, measured up a frame for a harness support. You shouldn’t simply run the harness through the foam, in a biggie you can break your collar bones, or crush your spine. I already have 2 crushed discs, don’t want any more.
6A95EC25-BA5D-4B2B-A2DF-1E80C25C9B63.jpeg
1.5mm steel sheet formed over 8mm steel bar.
Rosette welded and seam welded. Only noticed after I’d finished I was still on argon and stainless wire. So at least the weld won’t rust.
E7BEF9A7-E10B-476C-827E-5BA34B5D32AC.jpeg
C3F2E4D7-1D4A-478F-9DCD-7B001ADDF774.jpeg
Time for some chocolate Swiss roll and ice cream.
 

IainP

Zorg Guru (II)
British Zeds
Joined
Feb 20, 2019
Points
119
Location
Out of my Tree, North of Perth, Scotland
Model of Z
1.9
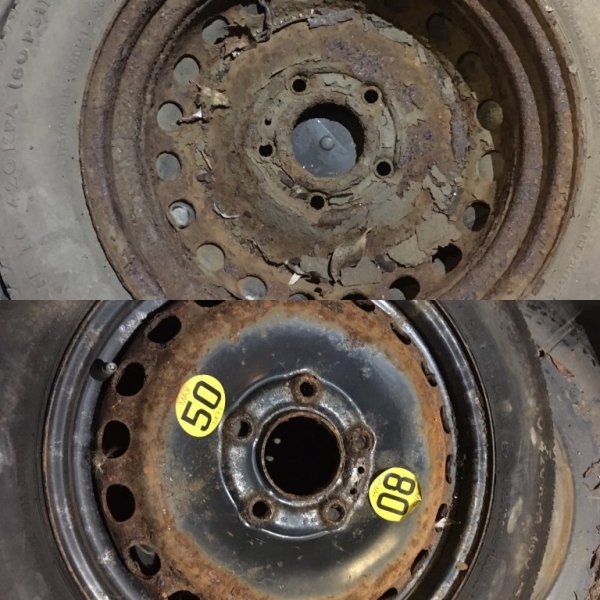
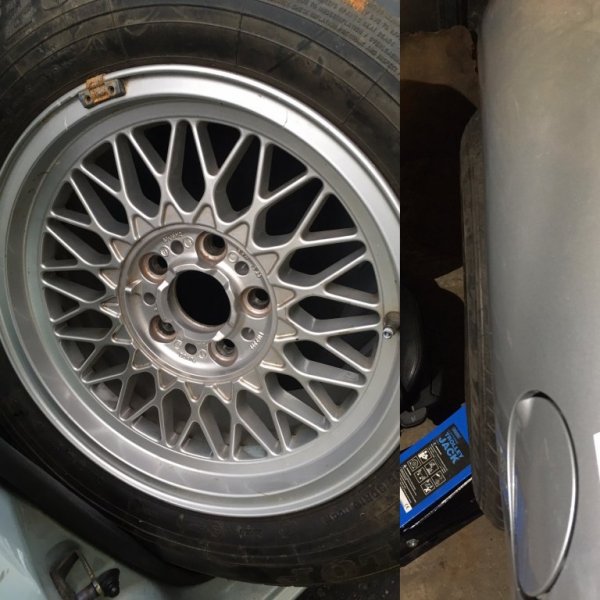
Not gotten much done, popped my back Tuesday night getting this spare wheel out.

092083B4-22FB-49A3-BF12-37B0B446E67E.jpeg
Don’t much like the look of that, holds air and the tyre isn’t cracked, but, eww.
New, or new to me, wheel and tyre required long term. Cans of stuff are all right, but last 3 family punctures have all been burst sidewalls or dead wheels.
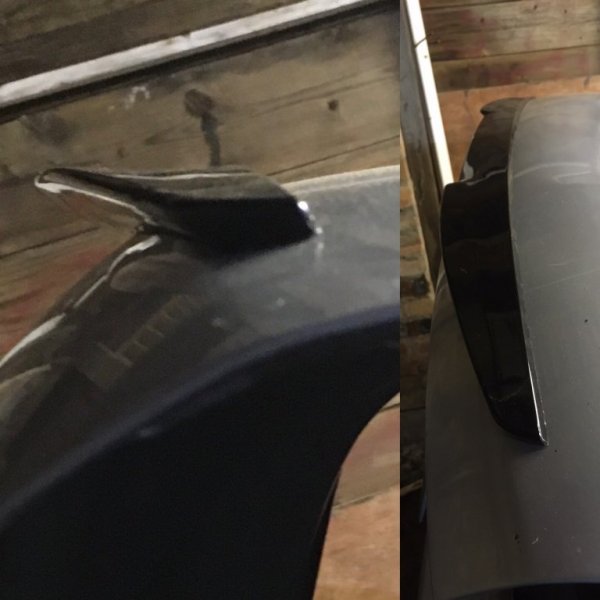
Been looking for a gen rear spoiler for ages, couple appeared on the ‘bay but I’m not paying £150-200 for something incomplete, poor condition, or both. I rediscovered this hideous Chinese tat abandoned in the depths of the garage whilst looking for something else. Stuck it with masking tape last week to try.

54BF2CDE-6332-4369-9075-72417BE214FF.jpeg
It is Sooo Utterly Hideous i actually quite like it, so it’s now stuck on with 3M tape.
😂
Puts a smile on my face every time I see it now. Not that I can at the moment, popped my damn back again, currently lying half under the car on my crawl mat attempting to pop a couple of vertebrae back. Only saving grace, it looks from here like some of the floor grommets have either come out, or, been pushed out. I wonder if that’s the cause of at least some of the water, or, a desperate attempt to let it out? Will need to investigate that more when I can move properly.
 

IainP

Zorg Guru (II)
British Zeds
Joined
Feb 20, 2019
Points
119
Location
Out of my Tree, North of Perth, Scotland
Model of Z
1.9
I don’t think that grommet should look anything like that
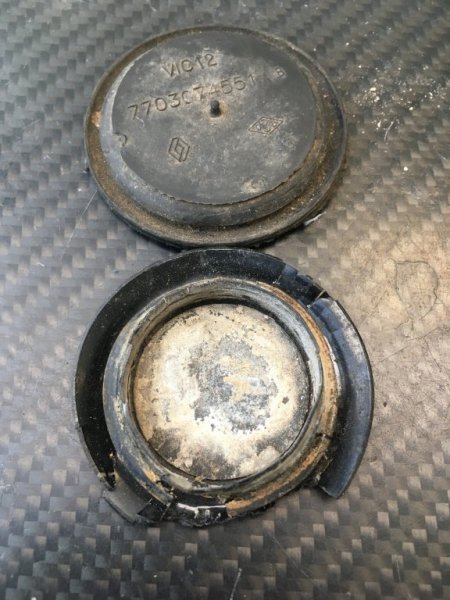
22BA959B-03C7-47EB-880E-1583B3A6AC34.jpeg0AF765EA-AA0B-4311-9AF0-F24B74C1089D.jpeg
Dunno whether that hole is due the wearing from the floor or because some has stuck a screwdriver through it.
New ones and Tiger seal required.

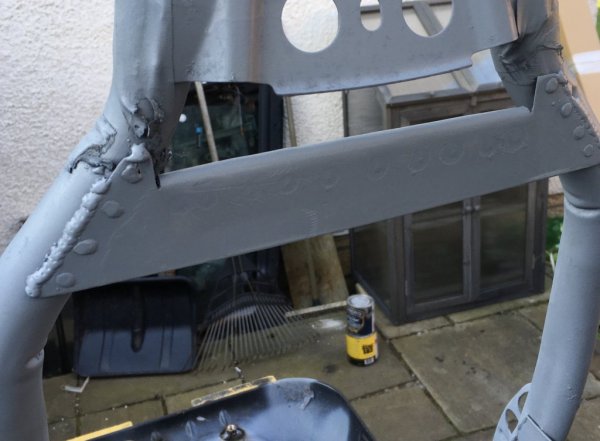
Spent yesterday painting seat frames and cleaning/ greasing the screw drives. I knew the bushes needed replaced, this little lot came from the driver seat, nothing left, no wonder the seat moved.
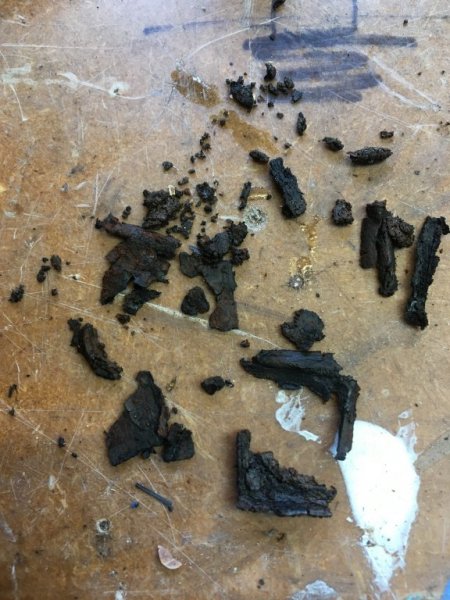
9B8FA1FF-BF8E-4E11-A93F-385FD33EFDAB.jpeg
I knew I had a problem with one rail of the passenger seat, really difficult to move, it was as I suspected, the limiter was smashed into the cage.
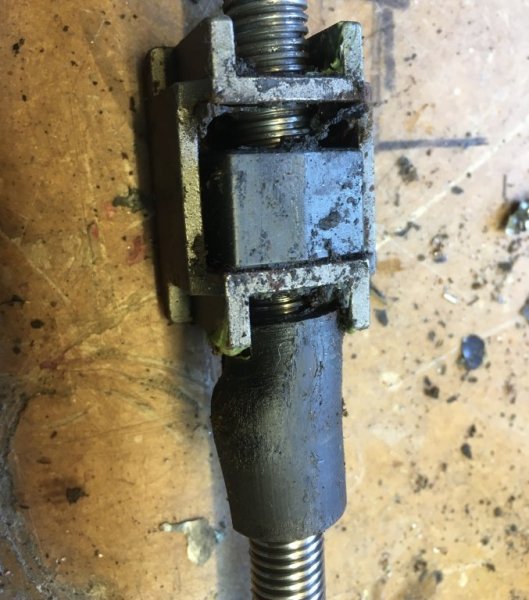
7CDF13D3-8A02-42D6-A518-A6A73AF58FDC.jpeg
Prised it out and reversed it.

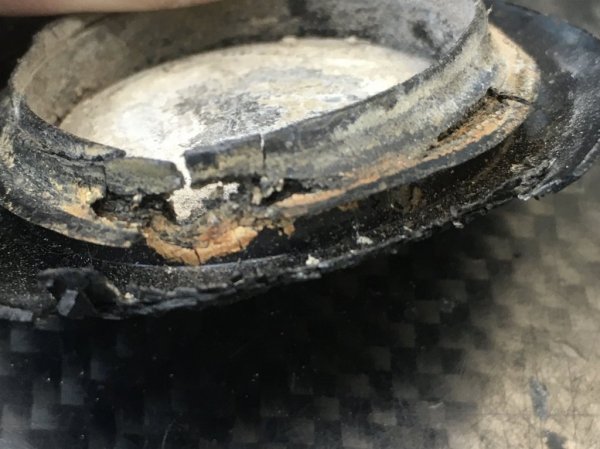
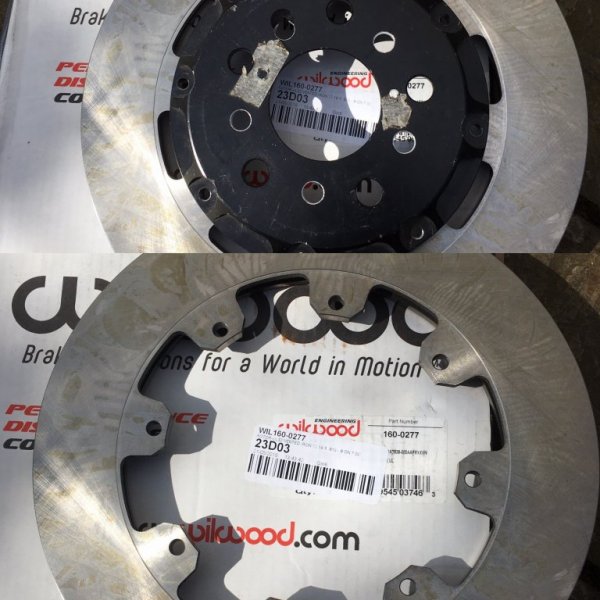
Delivery of some Wilwood rotors, long term plan, 300’s with Ali hats.23CDE6D3-42E2-425B-AACF-34258F5B7065.jpeg
Not those hats though, those are off an Audi, redrilled for my Pontiac. When I get a chance I’ll sit down and design some for the Z.

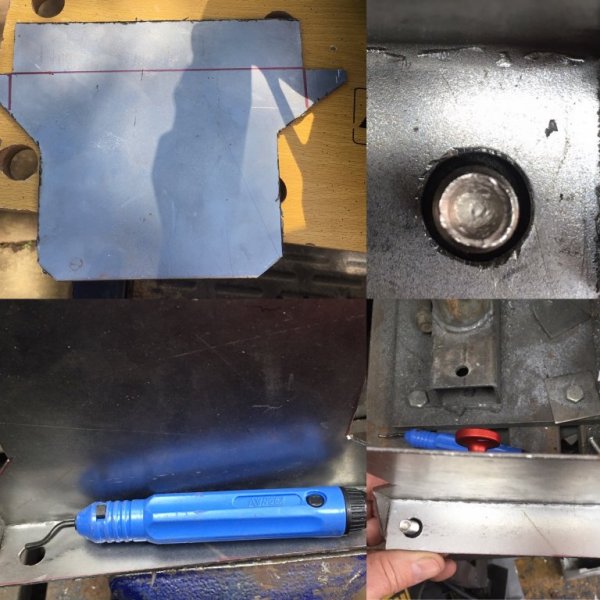
Chopped some steel for the extinguisher bracket to go on the passenger seat. Something weird wwith one of my grinders, the handle is wobbling, with one in Airdrie and the guard missing on the other I just had to get on with it. Cutting a straight line was next to impossible.
2925BCAF-93B9-465F-BD0D-45F61B417DDA.jpeg
If you’re fitting something with captive nuts, it’s better to drill at least the next size up. Not because it hides mistakes. If you don’t have any clearance you can easily damage the threads of your fastener and if it’s something that needs a specific torque value, well then, you have a problem.
The blue thing is a Noga tool, takes replaceable carbide blades. They’re wonderful, works on plate or drilled holes. I keep a flap disc in a grinder for the flat bits as it’s far faster, but holes, whirl with the Noga, done.
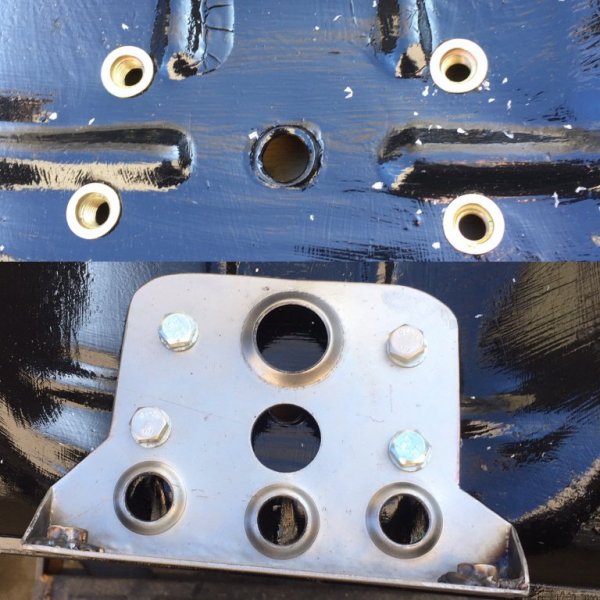
Brought my rivnut tool back from Airdrie so didn’t have to weld captive nuts.
AE2475F3-058C-43E3-BD3D-84BE4BD00CA6.jpeg
I even managed to dimple it neatly.
That black paint is Ronseal straight to metal paint and it doesn’t do what it says on the tin. Water based, so no smell, but it doesn’t dry as quick as claimed, it doesn’t cover very well, needs to be completely dry before overcoating or it pulls. Doesn’t self level so loads of brush marks. I’m glad I didn’t buy silver for the inside, be reverting to Finnegans for that.
Added the heated panels and built the passenger seat up, didn’t take pics of that, there will be loads on here already. Pulling the bolsters in made the back really tight, impossible to tell in the pics but there’s definitely a difference.
5030403D-E310-4045-8B8A-478714A9B142.jpeg
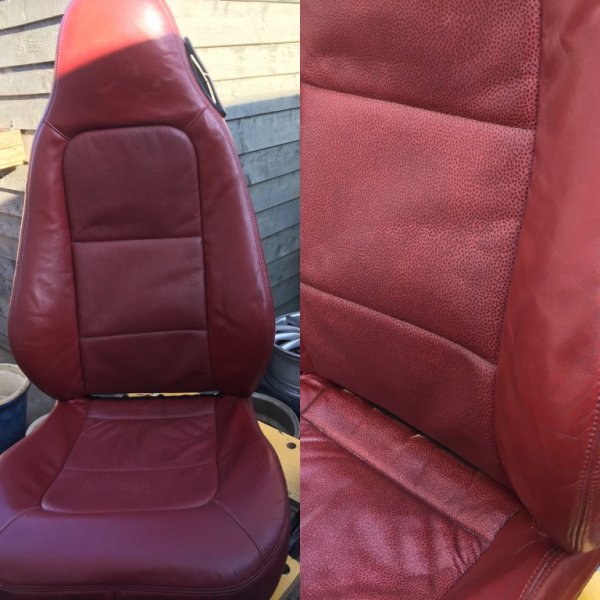
The car has black seats, with a hole in the passenger seat base, I got red covers for £60 quid with theplan to die the base black. Fly in the ointment, once I cleaned the cover before dying it, I liked it, I mean I Really liked it. Plan now is red seats and door panels. There were a pair on eBay up at Gairloch, just a passenger seat now, but I’ll have a go at cleaning and die for the drivers seat.
 

IainP

Zorg Guru (II)
British Zeds
Joined
Feb 20, 2019
Points
119
Location
Out of my Tree, North of Perth, Scotland
Model of Z
1.9
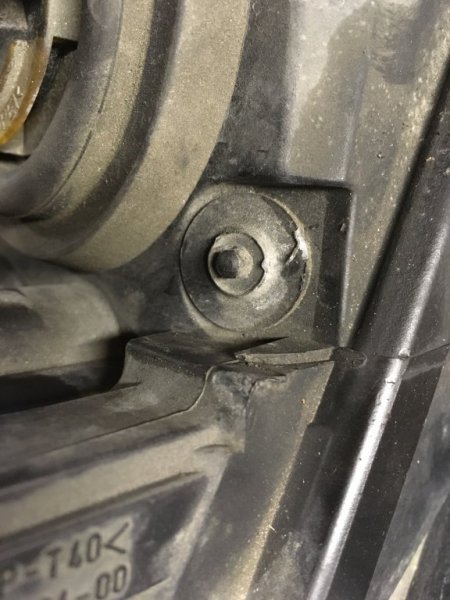
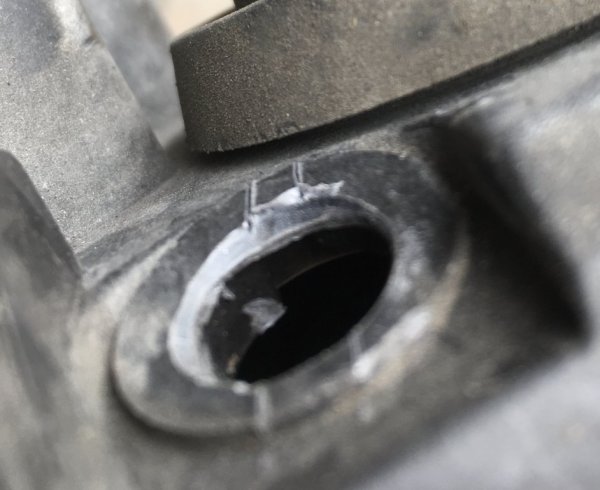
Oh, both of my seatbelt guides were snapped, back when I was doing the composite for the lights I removed the guides, superglued them, then filled them with epoxy and carbon. If they brake again it’ll be because the epoxy has debonded from whatever that plastic is, I cleaned it, roughed and scored it. Time will tell.

EFD7B618-CFA2-418A-91EF-C4E22E5E2CCF.jpeg
 

IainP

Zorg Guru (II)
British Zeds
Joined
Feb 20, 2019
Points
119
Location
Out of my Tree, North of Perth, Scotland
Model of Z
1.9
My poor HoS Clio has taken a battering this week
C122FC1C-5B28-4406-99DB-33D9A8B93EEB.jpeg
Picked up a Style 5 in 8Jx16” to try, but looks like I’m out of luck. That’s only a 235 but it already looks a bit Carlos Fandago (ask your parents, or Youtube), never mind with the 245’s.

E2FB9AD9-846B-4B9B-A313-A0BC80F94D29.jpeg
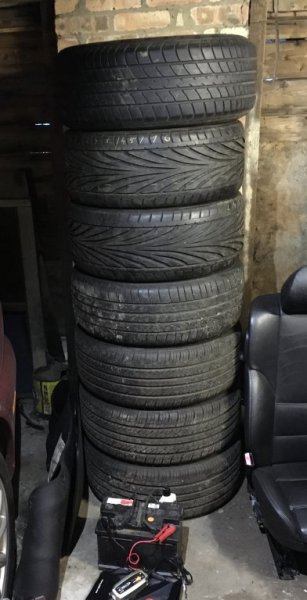
Even here, my wheel stack is getting out of hand.
9BD1426D-E0B2-4C18-B756-A17C097FBC6D.jpeg

Trip to Scott at Retro Bimmer in Kilbirnie
A10C051F-C163-412C-8E20-AA1D14F2A154.jpeg
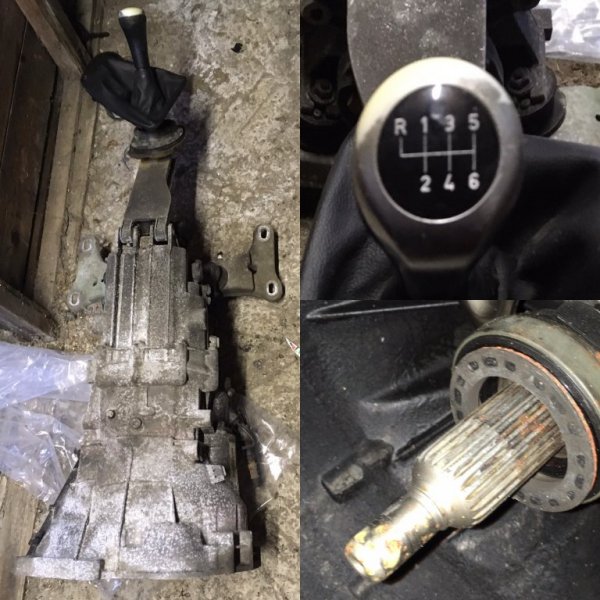
Ostensibly just to pick up this gearbox for a measly £75. Not something I’ll fit right away, I need to sort a light flywheel and a 22 spline disc, never mind another prop to shorten, but, 75 pictures of the Queen? Not passing that up.
09B0794B-1706-4DA0-927D-657B8F78E398.jpeg
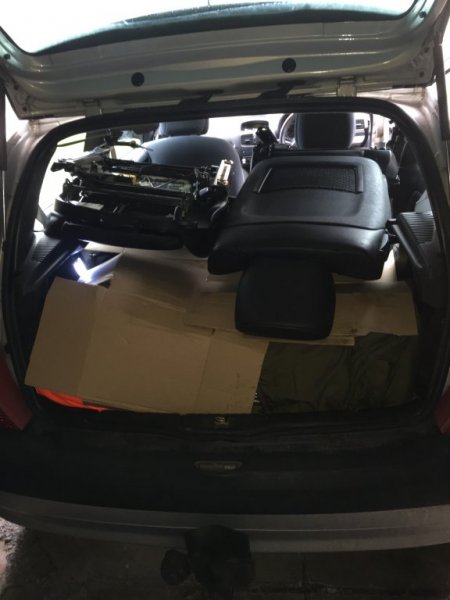
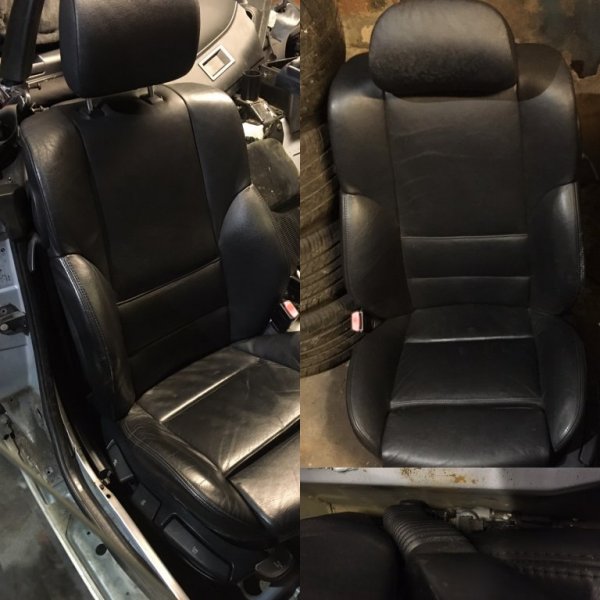
Not quite such a cheap trip, as I asked about some coupe seats he had with a bit of wear. “Oh, I have some better ones too”. Indeed they were, almost unmarked, nothing some saddle soap won’t sort. Manual, yay! Height and recline, adjustable for angle and reach. Right then Scott, where’s the nearest cash line? “You want them today? You’ll never get them in there?” I’d had to rearrange all the stuff in the Clio to get the gearbox in. “I’m good at Tetris, I’ll get them in”.
And I did, after a couple of trials. Couldn’t get it out once it had settled on the drive to Airdrie, that too a little manhandling.
They look fantastic and are very comfy, better lumbar support, sitting in one right now waiting on someone delivering something. I just know know they’ll turn up as soon as I crawl under the car.
Shame though, they don’t fit!
B4D5BEBD-674E-471D-B9BA-03E2845995EF.jpeg
The seat back is too wide at the top, the back release hits the pillar. I can’t go any further in, the belt mount and actuator are hard up against the tunnel, and that’s before the carpet goes back in. They’re too high as well, even in the lowest setting.
My stuff arrived.
 

IainP

Zorg Guru (II)
British Zeds
Joined
Feb 20, 2019
Points
119
Location
Out of my Tree, North of Perth, Scotland
Model of Z
1.9
Back to odd hours here and there.
Have all the calipers bled, quite eager to get it bedded in.
700D3F2F-589D-4122-A269-34FD6480288D.jpeg
Not getting time to finish my front lights so bought a spare, found it didn’t have a hole for the sidelight, out came the drill.
DCCE32B3-D3F7-40EA-BEFA-8B80F9921EA1.jpeg
Bit of luck, the inside is moulded for the sidelight, bit of work with a file and sorted.
C6B8E933-F65B-4F24-B3D0-A025556B8C90.jpeg
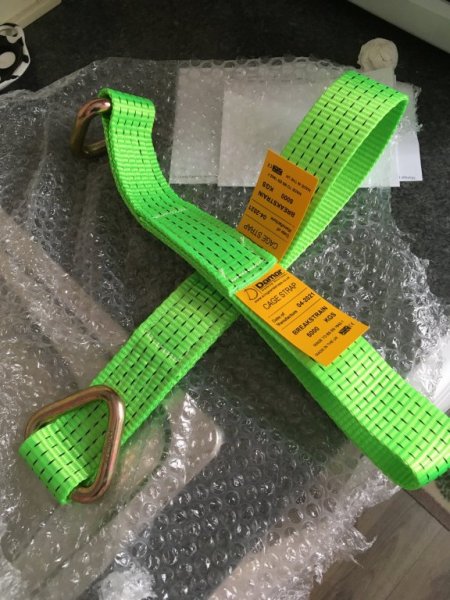
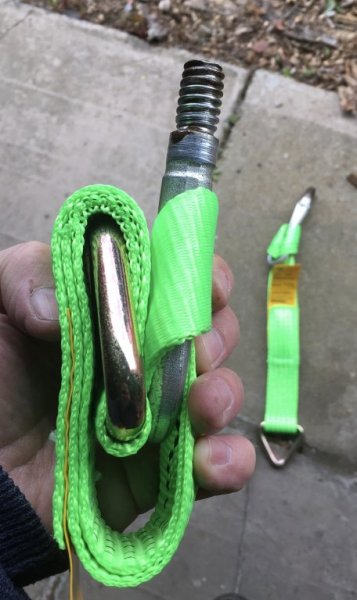
My delivery, tow straps from Damar webbing, Made in the UK, highly recommend them if you need any kind of strap.
57244091-EB8C-4501-8708-4B35FEBC0BFA.jpeg
299B2309-8956-4086-B190-E566E1BD1C9D.jpeg
Just needs an elastic band, some people use tie wraps, as a marshal we prefer elastic, saves getting a tool out to chop the tie wrap.
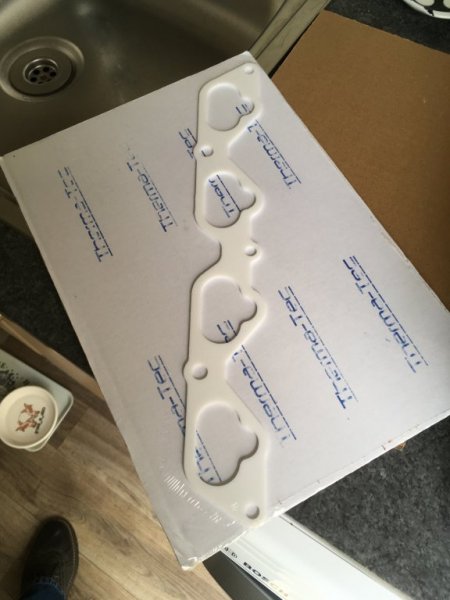
Other delivery, heat spacer, I have plans for that in the future. Hopefully.

879F73CF-5DC7-413B-8516-800B1BB3DEF2.jpeg
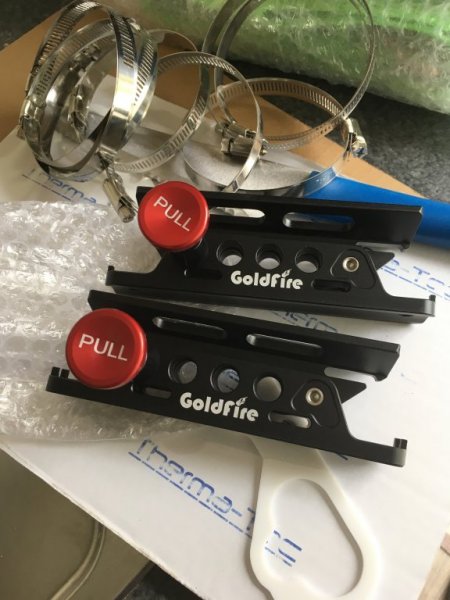
And extinguisher brackets in alloy, much more substantial than the nylon ones I have.
6E459D09-6F65-4D64-991E-8BC80E43FDE8.jpeg
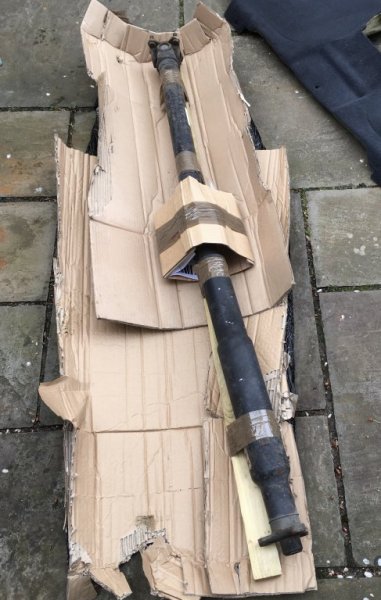
Another propshaft, I now need to find out gearbox lengths so I can have this shortened and balanced.

80A8D2C2-BD5E-48CD-A515-8128B8B84C7D.jpeg
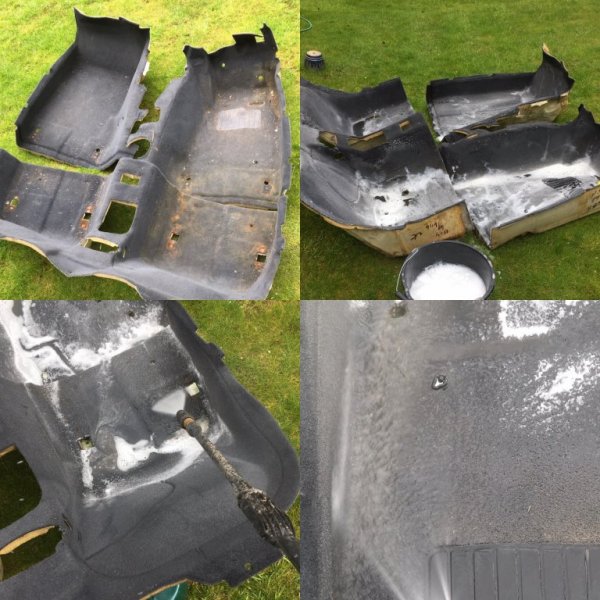
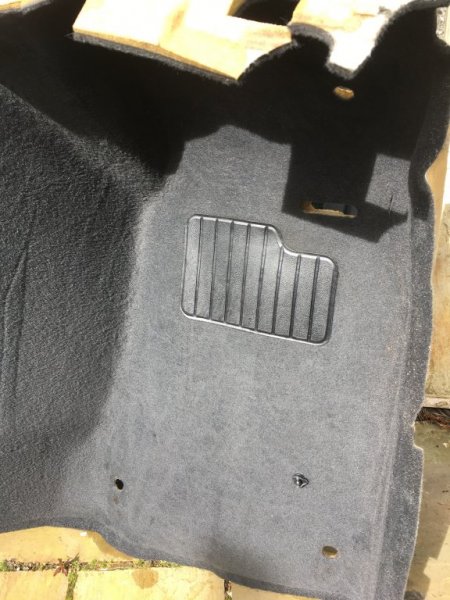
I brought the carpets home and went a bit drastic, attacked them with hot water, Fairy Liquid, a brush, then the power washer.

C549E7E9-DA9F-42CB-9804-ED4AFBE7873D.jpeg
Yes, the water really was that dirty and never really seemed to fully clean. I opted to use the fine jet on a bit that would be covered by the seat, just in case it went straight through. It didn’t, but oh dear god, the amount of dirt that came up was disgusting. Did everything like that, which left it all marked, but going over several times with the fan jet brought the pile back up.
Really glad I did it though, because it came up like this.

FFF0AA57-F262-47CC-81A2-4076E3238D9E.jpeg
Which is a completely different colour than it started! I could have been a bit more vigorous with the inner sill part on the driver side I think, but overall I’m well chuffed. Overmats should keep them like that.
 
Top