Rebody Z3 Based Ferrari 250 California Build

t-tony

Zorg Expert (II)
Supporter
British Zeds
#ZedShed
Joined
Dec 31, 2013
Points
226
Location
Torksey Lock,Lincoln, England
Model of Z
E89 Z4 23i Auto
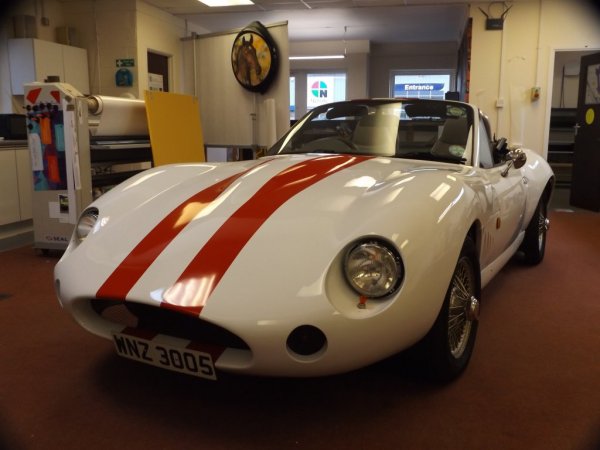
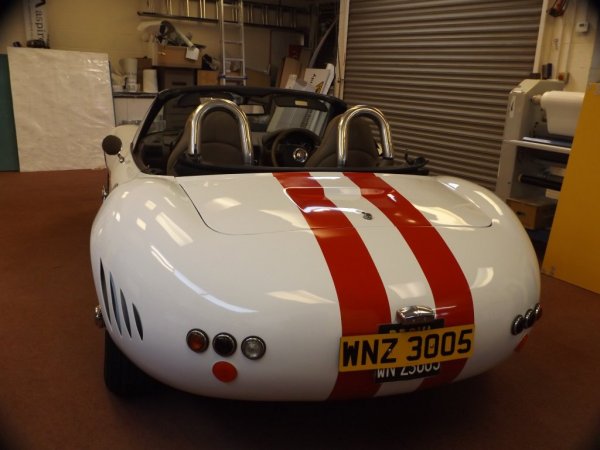
Tonight’s work, a few easy wins for a change.

Test fitted:
  • Rear lights
  • Reflectors
  • Rear fog light
  • Reversing light
  • Rear number plate lights
  • Boot lid pull
  • Boot rubber
  • Boot lock lower catch
The lights are not bolted up tight so do not look like they fit yet.

Of course it all has to come off again for body prep and wiring in but hey-ho!

Number plate cost a fortune, bought it from Chris Evans!!!


View attachment 197809
View attachment 197811View attachment 197813View attachment 197815View attachment 197817View attachment 197819
Are the rear light units from Austin/Morris 1100/1300 series cars?

Tony.
 

MisterP007

German-Italian-British Mix - What could go wrong?
Supporter
British Zeds
Joined
Jul 24, 2020
Points
144
Location
Tunbridge Wells
Model of Z
Z3 2.8
Are the rear light units from Austin/Morris 1100/1300 series cars?

Tony.
Hi Tony

Rear lights are early MGB, but the1100/1300 were the same.
 

MisterP007

German-Italian-British Mix - What could go wrong?
Supporter
British Zeds
Joined
Jul 24, 2020
Points
144
Location
Tunbridge Wells
Model of Z
Z3 2.8
Short car working period today.
  • All lights cut in and test fitted
  • Door handles and wing mirrors in place
  • Started pulling the front end back apart and sussed out the wiper motor position
  • Removed the bonnet catch bracket, primed and satin blacked
Onwards and upwards.


366887FD-A313-4ADA-9CAD-0F50C66F2049.jpeg
A925A14D-D519-4664-9E0A-7FD4FC6274BB.jpeg
6A570BC0-732B-40E7-8349-BC1CAA7D5CB8.jpeg
57524878-363C-4273-83B8-8622805E8145.jpeg
425CC949-574D-43B9-AEBE-77AC15F9F300.jpeg
6AB31317-C38D-4144-8707-9582822EA4E8.jpeg
52DA08DC-D7FD-4D09-8132-765D052D5803.jpeg
343C84CB-540E-4B0C-974C-07237A1EB149.jpeg
441A7C4B-90D4-4721-ABB2-56BD0C3318F6.jpeg
 

MisterP007

German-Italian-British Mix - What could go wrong?
Supporter
British Zeds
Joined
Jul 24, 2020
Points
144
Location
Tunbridge Wells
Model of Z
Z3 2.8
Busy afternoon making stuff, bit of light engineering:
  • Fully set up the wiper motor position, drilled and bolted the motor bracket in place (not in the normal position as I found it simpler to fold a bit of the Z3 panel work to make a bracket (see pics))
  • Cut and fitted the Bundy Tube for the wipers
  • Made up strengthening brackets to support the bonnet hinges (they have been flexing a bit)
  • Formed curved plates to use for supporting the underside of the headlight cowls (avoids a point load and possible cracking of the GRP
Ran out of daylight as I have been working on the car in the drive in the decent weather

Last pic is SWMBO taking nail varnish off her feet, foil helps keep the acetone soaked cotton wool in place!!!

A2C0D42E-59F8-4220-BB81-3266B172C3D8.jpeg


67E88F2F-B14C-4172-A7EA-24441EBBCE72.jpeg


8422A16F-5CF8-48CD-B096-7423F837823A.jpeg


0D5D48AF-F662-4F32-961A-6ECA82C57234.jpeg


C4FD4D76-CB5B-4BCC-9C55-4F006CD2D175.jpeg


DB31F235-4D77-4926-A313-B6431F865D83.jpeg


6E827DA1-E80E-4530-A715-D859F59F6BB1.jpeg


FD9008FE-53B4-4D2C-93B6-28C519C8CDCF.jpeg


10D9CE02-7B38-4119-844C-41FA8DEC0674.jpeg
 

MisterP007

German-Italian-British Mix - What could go wrong?
Supporter
British Zeds
Joined
Jul 24, 2020
Points
144
Location
Tunbridge Wells
Model of Z
Z3 2.8
Are you ready for today’s instalment?

Good, then I will begin.
  • Wired in the new wiper motor to the circular BMW connector
  • Removed the wiper Bundy tube and greased the mechanisms before re-assembling
  • Satin Blacked the light cowl plates and bonnet hinge supports, these were then fitted later. I will be glueing the plates to the bottom of the headlight cowl to spread the load of the front clam. The height adjustment and ability to unbolt the whole front end will be retained
  • Drilled the fixing holes for the doors
Could not be bothered lifting the front end back on so left it peeking out from behind the cars like a Crazy Frog!

Oh, and did you know Mercedes made giant, rolling toolboxes?

F76C0F08-0098-469A-A1BC-F5554A3BD135.jpeg


CACA6211-EB3F-4720-86F2-6C41364C8D9C.jpeg


2AE4B258-6922-46AA-82AE-426EFBE43FD0.jpeg


56D4292D-A2C7-4960-A92D-C9196B97C30B.jpeg


76DFF40C-0B15-42E0-B786-19C38E9D37CC.jpeg


D9C811FD-6B4C-4B39-AAFA-62DF0C71FFBE.jpeg


BD25073C-7BF4-437D-A656-6F0818DE782A.jpeg


9239B6E9-64A0-446F-986D-192A52FA0F02.jpeg
 
Last edited:

MisterP007

German-Italian-British Mix - What could go wrong?
Supporter
British Zeds
Joined
Jul 24, 2020
Points
144
Location
Tunbridge Wells
Model of Z
Z3 2.8
Those of you paying attention will know that I left the front end off the car last night because I was too lazy to grapple with lifting it back on.

Woke up this morning to battering rain, which has given the engine bay a nice pressure wash! So ended up outside at 7.30 am lifting the wet and slippery front end and bonnet back on. Hopefully not too much water in the alternator (i will dry it out later).

Moral of the story: Do it when you are looking at it, then it is done!

Had to go out anyway as the two flimsy summer gazebos that are over the garden table and sofas were about to collapse under the weight of water ballooning in them.

Is that it for summer? Hope not, but it looks like the car will need to go back into the workshop to be worked on later.

Welcome to Britain! You have no idea how much I miss Mallorca - having said that, there is no real Replica car scene over there and the car would probably be uninsurable!
 

IanA

Zorg Legend
British Zeds
Joined
Oct 4, 2014
Points
74
Location
Oxon
I must be bloody crazy! What do you all think? Answers on a postcard please.
One is not enough.
I've just seen this thread- great work.
Is the rear bumper "shelf" big enough to hold a pint glass?
I have available an aluminium "egg-crate" grille that I didn't use on my 250 front. It may be wide enough.
 
Last edited:

jaguartvr

Zorg Guru (I)
Joined
Jan 9, 2017
Points
95
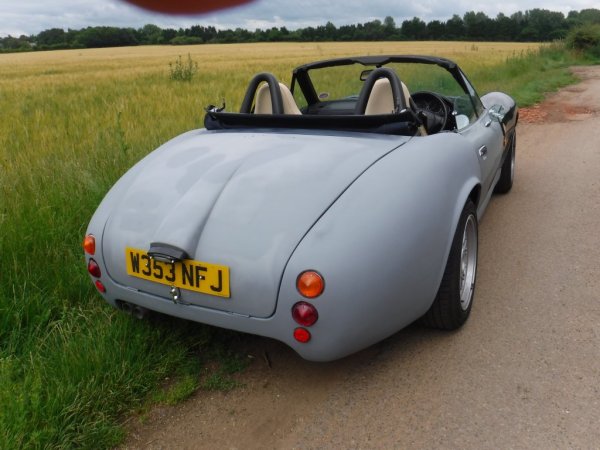
Option 1 use genuine 250 rear lights, about £550 a pair, as they are about 2" shorter you will have to reshape both rear wings, lower the top edge and probably the boot as well to get it to look correct.

Option 2 3D print a new rear lens, have heard this so many times, whoever is going to print them soon goes quiet.

Option 3 Chop up and glue 2 lenses up to produce a smooth lens, this has been done and looks good but I have never seen a close up picture

Option 5 Learn that it is a BMW Z3 (albeit a pretty one). Fine to spend thousands on door & boot handles etc but do remember the windscreen is the biggest giveaway and you simply can't change it.
 

MisterP007

German-Italian-British Mix - What could go wrong?
Supporter
British Zeds
Joined
Jul 24, 2020
Points
144
Location
Tunbridge Wells
Model of Z
Z3 2.8
One is not enough.
I've just seen this thread- great work.
Is the rear bumper "shelf" big enough to hold a pint glass?
I have available an aluminium "egg-crate" grille that I didn't use on my 250 front. It may be wide enough.
Once a King, always a King, but once a Night is enough!!!

Have to have two Fauxrarris, rude not to!

The rear bumper shelf most definitely holds a bottle of beer, two dirty coffee cups and a Bacon Buttie (ask me how I know?)

Egg Crate Grille from 250SWB, will it fit the Cal? I am off to measure, hold on a minute.......I'm back.... and the answer is?

Almost:

  • 250SWB Egg Crate Grille measures 1000 x 280 mm ish (can't get the tape measure in properly)
  • Grill mouth on 250 Cal measures 1035 x 230 mm ish
Therefore Height is fine, width is short by 17.5mm each side minus the thickness of the Stainless Steel Grill surround when fitted (Guessing this will use up 8-10 mm each side) so very close and I could find a way around this easily enough.

Send me a PM with details (could you measure it please) and how much you would like for it.

What about pics of your Z3 re-bodies Ian
 

MisterP007

German-Italian-British Mix - What could go wrong?
Supporter
British Zeds
Joined
Jul 24, 2020
Points
144
Location
Tunbridge Wells
Model of Z
Z3 2.8
Option 1 use genuine 250 rear lights, about £550 a pair, as they are about 2" shorter you will have to reshape both rear wings, lower the top edge and probably the boot as well to get it to look correct.

Option 2 3D print a new rear lens, have heard this so many times, whoever is going to print them soon goes quiet.

Option 3 Chop up and glue 2 lenses up to produce a smooth lens, this has been done and looks good but I have never seen a close up picture

Option 5 Learn that it is a BMW Z3 (albeit a pretty one). Fine to spend thousands on door & boot handles etc but do remember the windscreen is the biggest giveaway and you simply can't change it.
Hey Steve and loyal readers...

Almost nobody who asks about my 250SWB has any idea it is a Replica, apart from the occasional car buff. Unless you are a Ferratic or a Fanarri (my names for a Ferrari Fanatics/Fans) you would never know a lot of the bling is Mini, MGB, Alfa Romeo, TR6 and of course BMW Z3.

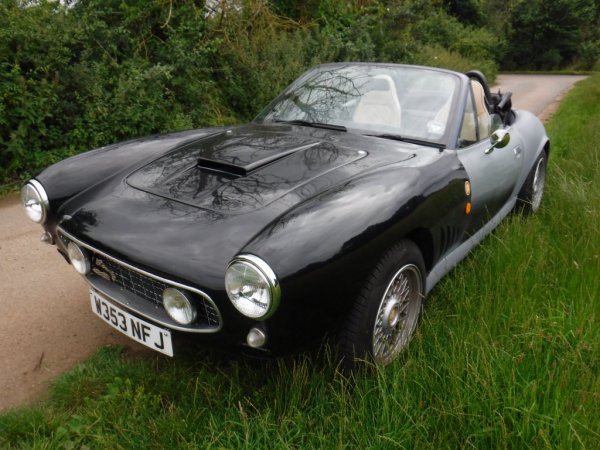
"But", I hear you yell, "the quarterlights and windscreen rake give it away" or, "that does not sound like a Columbo V12", or "those brake/clutch/accelerator pedals look modern (ish)". Again unless you are a Z3 aficionado, Ferratic or general massive petrol head nobody notices, all they see is a great looking car that sounds like a wailing banshee when you get a move on, starts when you turn the key (unlike the original), goes, turns and stops when you ask it to and is a real hoot to drive if you do not mind your car getting more attention than you and even being cheered by people in the High Street.

So in my view, there is no real reason to go for original Ferrari lights / other parts or exact replicas for all of the problematic reasons mentioned by Steve above. The cars look fantastic without and they are not Ferraris!
 
Last edited:

MisterP007

German-Italian-British Mix - What could go wrong?
Supporter
British Zeds
Joined
Jul 24, 2020
Points
144
Location
Tunbridge Wells
Model of Z
Z3 2.8
It is what it is, enjoy it, but you can fit the instruments, just arrived from Grassbanks
Just waiting for a reply from Justin as to when mine are due...... hang on a tick, an email has just landed......apparently they are ready and will be sent to me next week (need to pay the balance 1st) . Things of beauty, I love bling, even SWMBO is "happy" for me to spend the money on these (she loves bling).

Happy days.
 

MisterP007

German-Italian-British Mix - What could go wrong?
Supporter
British Zeds
Joined
Jul 24, 2020
Points
144
Location
Tunbridge Wells
Model of Z
Z3 2.8
The fact that they are plug-and-play running from the original cluster PCB is a master-stroke from Grassbank. The ETB set on my 250SWB took forever to wire as you can see in the pics below (and these do not show the fannying about to get to under-bonnet sensors for water and oil, take off points for Tacho, wiring to the speed sensor on the rear diff and petrol tank wiring).

Interior Finished Dash 1.jpg
Interior Instruments Fitting to Dash 4.jpg
 

jaguartvr

Zorg Guru (I)
Joined
Jan 9, 2017
Points
95
The wiring of all the switches, power windows, roof etc was harder than the instruments, Justin has said that he is working on a plug n play solution for this as well.
 

MisterP007

German-Italian-British Mix - What could go wrong?
Supporter
British Zeds
Joined
Jul 24, 2020
Points
144
Location
Tunbridge Wells
Model of Z
Z3 2.8
Brilliant.

Thinking of dash fitments:

  • What cables/knobs are used to get rid of the BMW heater controls, is it just a case of a position rotary switch for the fan, and two MG style pull and twist cables for the heat and direction of blow?
  • Also, can you remember how you wired in the mom on - off - mom on rotary switch for the windows. The Durite ones I have are 3-pin.
Cheers
 

IanA

Zorg Legend
British Zeds
Joined
Oct 4, 2014
Points
74
Location
Oxon

jaguartvr

Zorg Guru (I)
Joined
Jan 9, 2017
Points
95
Tribute grills can be cut out of 1m wide alloy, California need a 2m wide piece, makes it more expensive to make but you can get the verticals out of the waste
 

jaguartvr

Zorg Guru (I)
Joined
Jan 9, 2017
Points
95
The heater controls incorporate the cables for the flaps so you need to use the existing BMW heater panel, I fitted it to the back of the front section of the centre console and fitted 3d printed knobs with longer stalks than the original BMW ones. Looking to get the next one cnc made out of alloy.
 
Last edited:
Top